An Almen round is a thin round disk used to quantify the intensity of a shot peening process. Developed in 1994 by Rudolf Bosshard in Switzerland, it is a modification of the Almen strip method, which is used worldwide as a surface treatment testing method[1] in the field of shot peening. The basic principle is the same, but due to the simple shape and minimized size, the Almen round is more suitable for automated processing and installation on dummy rigs. Also instead of the Almen block according SAE J442,[2] here a matching device is used and if connected to electronic processing unit, the Almen value[3] according AMS-S-13165 (predecessor MIL-S-13165 Rev.C) can be evaluated in one run.
Test specimen
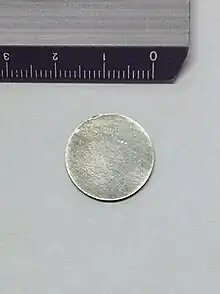
The Almen round is a circular cutting from an original Almen strip normally in material SAE 1070. It can be either of a "A", "C" or "N" type offered in various quality grades. The standard strip allows the splitting into four pieces rounds, which have a diameter of 18.7 mm, by either waterjet or laser technique. Therefore, the spaces are maintained in respect of material and thickness. The flatness test to follow is simple and imprecise pieces can be eliminated.
Specimen holder
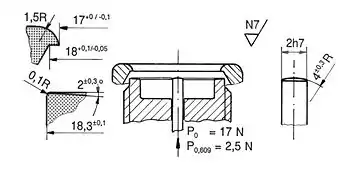
In the endeavor to standardize the parameters, the clamping down of the Almen rounds follows a strict geometry. The clamping head fixes the Almen round in correct manner, thus important for all related procedure. When working with the monitoring sensor, the specimen is preloaded to increase overall accuracy.
Measuring technique
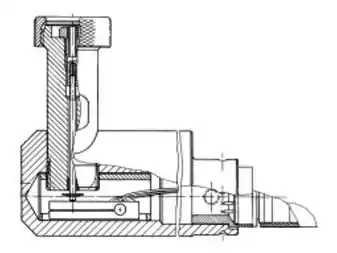
Other than the Almen strip method with the two steps: 1. Processing with holder[4] and 2. Measuring with gage,[5] the Almen round technique combines those activities. The specimen holder is complemented with a measuring system, e.g. a distance sensor system of various kinds to complete the monitoring sensor. While bombarded by shot, the captured Almen round gets bent towards the direction of the attack. The linear transformation gets converted into an electric signal sent to a processing unit. With calibration discs, errors will be minimalized. For the offline measuring of an individual round, the online monitoring sensor or an appropriate device will also be used.
Signal processing
Thus the equipment is designed for direct exposure to the shot stream, the deformation of the round can be monitored online and directly converted into the Almen standard arc high definition (SAE J443) either in mm or inches. Such a process time will be in the range of less than 5 to 40 seconds. If on screen, the graph[6] shows the basis for the calculation algorithm, also the essential point in mm or inches that is the output information equivalent to the original Almen round definition.
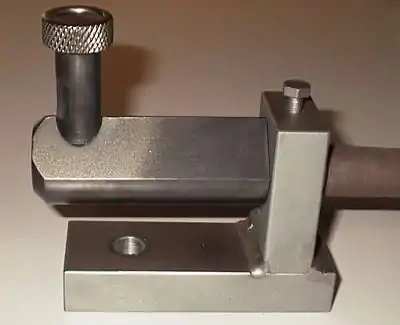 Online monitoring sensor with mounting fixture
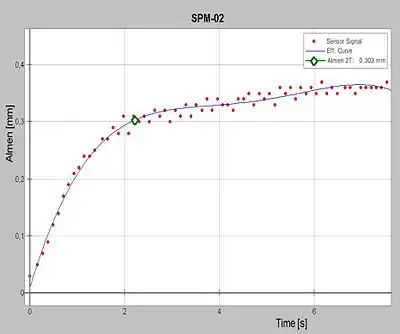 Automatically created diagram with final result shown
Advanced application
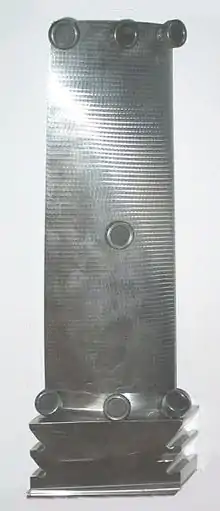
Many so called "critical parts"[7] require a test run with dummy parts. Therefore the Almen round is captured in a special mount that can be screwed or glued onto the dummy or even on a real part. In such a case an online monitoring is not possible, the specimens must get removed and then measured separately with the monitoring sensor. In this case, only the arc height can be traced. So this application should be in combination with a parallel running online process.
Field of application
The Almen round can be utilized in aircraft and automotive industry, research and subcontracting peening enterprises.
Application restriction
As the Almen strip principle has been established in 1942 and international standardization has reached a top-level. The strip work routine is a fixed procedure in practical peening technology. The Almen round principle is more accurate and offers a considerable working time reduction. But as there is no international approved standardization, this technique will be used for special applications only.
References
Notes
- ↑ David Kirk "Peening Intensity Curves" Archived 2 July 2012 at the Wayback Machine. (pdf) Summer 2007
- ↑ "Test Strip, Holder, and Gage for Shot Peening". SAE International. 18 February 2013.
- ↑ "Shot Peening Intensity" Retrieved 23 January 2013
- ↑ "Almen Strip Holders" Archived 30 December 2010 at the Wayback Machine. (pdf) Retrieved 23 January 2013
- ↑ "TSP-3 Almen Gage" Archived 17 September 2011 at the Wayback Machine. (pdf) Retrieved 23 January 2013
- ↑ "Almen-Round demo" Retrieved 23 January 2013
- ↑ "Critical parts" Retrieved 23 January 2013
Bibliography
- Bosshard, R., "Online Monitoring with Almen Rounds". In: Rautaray, S. K. and Sharma, M. C. Shot Peening and Blast Cleaning (1996). Department of Mechanical Engineering. MACT-Bhopal. pp. 37–44.
- Sharma, M. C. and Deo, H. (2003). "Virtues & Limitations of Almen Round". In: L. Wagner. Shot Peening ICSP8. WILEY-VCH pp. 83–88. ISBN 3-527-30537-8.
- Bosshard, R. "High-Tech Contour Evaluation of ALMEN Test Plates". Metal Finishing News March 2011, Vol. 12, pp. 60–61
- "Procedures for Using Standard Shot Peening Almen Strip". SAE. 16 June 2010.