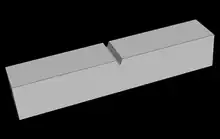
In mechanical engineering and materials science, a notch refers to a V-shaped, U-shaped, or semi-circular defect deliberately introduced into a planar material. In structural components, a notch causes a stress concentration which can result in the initiation and growth of fatigue cracks. Notches are used in materials characterization to determine fracture mechanics related properties such as fracture toughness and rates of fatigue crack growth.
Notches are commonly used in material impact tests where a morphological crack of a controlled origin is necessary to achieve standardized characterization of fracture resistance of the material. The most common is the Charpy impact test, which uses a pendulum hammer (striker) to strike a horizontal notched specimen. The height of its subsequent swing-through is used to determine the energy absorbed during fracture. The Izod impact strength test uses a circular notched vertical specimen in a cantilever configuration. Charpy testing is conducting with U- or V-notches whereby the striker contacts the specimen directly behind the notch, whereas the now largely obsolete Izod method involves a semi-circular notch facing the striker. Notched specimens are used in other characterization protocols, such as tensile and fatigue tests.
Types of notches
The type of notch introduced to a specimen depends on the material and characterization employed. For standardized testing of fracture toughness by the Charpy impact method, specimen and notch dimensions are most often taken from American standard ASTM E23, or British standard BS EN ISO 148-1:2009. For all notch types, a key parameter in governing stress concentration and failure in notched materials is the notch tip curvature or radius.[1]
Sharp tipped V-shaped notches are often used in standard fracture toughness testing for ductile materials, polymers and for the characterization of weld strength. The application of such notches for hard-steels is problematic due to sensitivity to grain alignment, which is why torsional testing may be applied for such materials instead.
A U notch is an elongated notch having a round notch-tip, being deeper than it is wide. This notch is also often referred to as C-notch, and is the most widely form of introduced notch, due to the repeatability of results obtained from notch specimens. Correlating U-Notch performance to V-Notch equivalent is challenging and is carried out on a case by case basis, there is no standardized correlation between performance values obtained with the two notch types.[2]
A keyhole notch is typically considered as a slit ending in a hole of a given radius. This type of notch is most often considered in numerical models.[3] Fracture toughness results obtained from keyhole notch testing are often higher than those obtained from V-notched or pre-cracked specimens.
See also
References
- ↑ Liu, M.; et al. (2015). "An improved semi-analytical solution for stress at round-tip notches" (PDF). Engineering Fracture Mechanics. 149: 134–143. doi:10.1016/j.engfracmech.2015.10.004. S2CID 51902898.
- ↑ "Charpy U-notch impact testing". Retrieved 15 September 2017.
- ↑ Kim, Jin-Kwang; Cho, Sang-Bong (2013). "Study on stress fields near V-notch tip with end-hole under in-plane and out-of-plane conditions". International Journal of Precision Engineering and Manufacturing. 14 (7): 1153–1161. doi:10.1007/s12541-013-0157-0. S2CID 255610800.