| Capture of Damascus | |||||||
|---|---|---|---|---|---|---|---|
| Part of the Middle Eastern theatre of World War I | |||||||
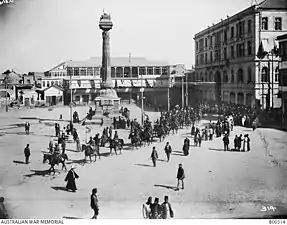
 A busy city square in Damascus 1918 | |||||||
| |||||||
| Belligerents | |||||||
|
| |||||||
| Commanders and leaders | |||||||
|
|
| ||||||
| Units involved | |||||||
|
XXI Corps Desert Mounted Corps Prince Faisal's Arabian Sherifial Force |
Remnants of the Fourth Army Seventh Army Eighth Army Asia Corps | ||||||
The Capture of Damascus occurred on 1 October 1918 after the capture of Haifa and the victory at the Battle of Samakh which opened the way for the pursuit north from the Sea of Galilee and the Third Transjordan attack which opened the way to Deraa and the inland pursuit, after the decisive Egyptian Expeditionary Force (EEF) victory at the Battle of Megiddo during the Sinai and Palestine Campaign of World War I. Damascus was captured when Desert Mounted Corps and Prince Feisal's Sherifial Hejaz Army encircled the city, after a cavalry pursuit northwards along the two main roads to Damascus. During the pursuit to Damascus, many rearguards established by remnants of the Ottoman Fourth, Seventh and Eighth Armies were attacked and captured by Prince Feisal's Sherifial Army, Desert Mounted Corps' Australian Mounted Division the 4th and the 5th Cavalry Divisions. The important tactical success of capturing Damascus resulted in political manoeuvring by representatives from France, Britain and Prince Feisal's force.
Following the victories at the Battle of Sharon and Battle of Nablus during the Battle of Megiddo, on 25 September, the combined attacks by the XXI Corps, Desert Mounted Corps, the XX Corps supported by extensive aerial bombing attacks, gained all objectives. The Ottoman Seventh and Eighth Armies in the Judean Hills were forced by the attacks at Tulkarm, and Tabsor to disengage and retreat, in turn forcing the Fourth Army, east of the Jordan River to avoid outflanking by retreating from Amman when they were attacked by Chaytor's Force. As a consequence of these withdrawals large numbers of prisoners were captured at Jenin while the surviving columns retreated behind a strong rearguard at Samakh.
The commander of the Egyptian Expeditionary Force, General Edmund Allenby ordered Lieutenant General Harry Chauvel's Desert Mounted Corps to pursue the remnants of the three Ottoman armies and capture Damascus. The 4th Cavalry Division began the pursuit, attacking rearguards along the inland road at Irbid on 26 September, at Er Remta and Prince Feisal's Sherifial Army captured Deraa on 27 September. The Australian Mounted Division attacked rearguards along the main road, at Jisr Benat Yakub on 27 September, occupying Quneitra the next day, at Sa'sa' on 29/30 September, and at Kaukab and the Barada Gorge on 30 September, while the 5th Cavalry Division also attacked a rearguard at Kiswe the same day. Following these successful attacks and advances the 3rd Light Horse Brigade was ordered to move north of Damascus, marching through the city on the morning of 1 October to continue their attack on the retreating columns, cutting the road to Homs.
Background
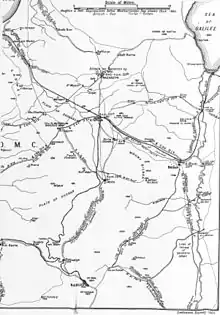
With the British Empire forces having gained all objectives during the battles of Sharon and Nablus; breaking the Ottoman front line and the extensive flank attacks by infantry divisions which continued while the cavalry divisions rode many miles to encircle, they destroyed two Ottoman armies west of the Jordan River with a third Ottoman army in full retreat, many of whom were forced to march after the Sherifial Army cut the Hejaz railway, while half its strength was captured by Chaytor's Force. The Yildirim Army Group had also lost most of their transport and guns, while the EEF advances further strained their administrative and transport services.[1]
At Lajjun on 22 September, Allenby outlined his plans to Chauvel for an advance to Damascus. Before this could be achieved, though, Haifa and important logistics nodes had to be captured. Additionally, the Fourth Army still held Amman and the rearguard was still in place at Samakh,[2] Nevertheless, on 26 September, the Inspector General Lines of Communication took control of all the captured territory up to a line stretching from Jisr ed Damieh on the Jordan River to Nahr el Faliq on the Mediterranean Sea.[3] The same day detachments from the XX and XXI Corps had moved north to take over garrison duties in the Esdraelon Plain, at Nazareth and at Samakh, from Desert Mounted Corps and transport from the XXI Corps was placed at their disposal.[2]
Prelude
Liman von Sanders withdraws
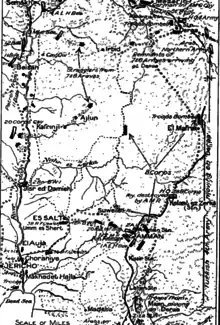
While Otto Liman von Sanders was out of contact until late in the afternoon of 20 September, following his hasty retreat from Nazareth in the early hours of the morning, the Fourth Army, still without orders stood firm. Liman continued his journey via Tiberias and Samakh where he ordered a rearguard late in the afternoon, arriving at Deraa on the morning of 21 September, on his way to Damascus. Here he ordered the Irbid to Deraa line established and received a report from the Fourth Army, which he ordered to withdraw without waiting for the southern Hejaz troops to strengthen the new defensive line.[4][5][6]
Liman von Sanders had found Deraa "fairly secure" due to the actions of its commandant, Major Willmer whom he placed in temporary command of the new front line from Deraa to Samakh. While at Deraa during the evening of 21 September, Liman von Sanders met leaders of several thousand Druses, who agreed to remain neutral.[7] He arrived at Damascus on the evening of 23 September, his staff having already arrived. Here, he requested the Second Army which was garrisoning Northern Syria to advance to the defence of Damascus.[8] Two days later; on 25 September Liman von Sanders ordered his staff back to Aleppo.[9]
Yildirim Army Group retreats
Between 6,000 and 7,000 German and Ottoman soldiers remaining from the Ottoman Fourth, Seventh and Eighth Armies had managed to retreat via Tiberias or Deraa towards Damascus, before these places were captured on 25 and 27 September, respectively and were at or north of Muzeirib.[10][11]
On 26 September Colonel Gustav von Oppen, commander of the Asia Corps (formerly part of the Eighth Army) reached Deraa with 700 men including the 205th Pioniere Company.[12] Liman von Sanders ordered von Oppen to withdraw by train; Asia Corps left Deraa at 05:30 on 27 September hours before Sherifial irregulars captured the town. Von Oppen's train was delayed nine hours by a break in the line 500 yards (460 m) long thirty miles (48 km) north of Deraa, to arrive at Damascus the following morning 28 September. Asia Corps was ordered to continue on by train to Rayak where von Oppen's corps was to strengthen a defensive line.[13]
Allenby's plans and preparations
After his initial meeting with Chauvel at Lajjun on 22 September regarding the proposed pursuit,[3] Allenby replied on 25 September to the Chief of the Imperial General Staff (Sir Henry Wilson) regarding pressure for an advance to Aleppo. In his reply, Allenby advocated for an "advance by stages", as had previously been undertaken. He added that this approach would be necessary "until the War Cabinet is prepared to undertake a combined Naval and Military operation on a large scale at Alexandretta, and to maintain by sea the military forces employed in it."[14]
A conference at Jenin on 25 September with GHQ and Desert Mounted Corps staffs, was followed the next day by a corps commanders' meeting chaired by Allenby and orders for the pursuit were issued on 27 September.[3] Allenby outlined his planned advance to Damascus to Wilson on 25 September. The first stage to the line, "Damascus–Beirut" was to begin shortly. While an infantry division marched up the coast from Haifa to Beirut, three divisions of the Desert Mounted Corps would advance on Damascus. The fourth division which had captured Amman was to remain to capture the retreating Fourth Army units from Ma'an. Allenby planned for Chaytor's Force to rejoin the Desert Mounted Corps at Damascus.[14] The 7th (Meerut) Division did not leave Haifa until the day Damascus was captured, on 1 October. The leading troops reached Beirut on 8 October.[15][16]
With Major General H. J. Macandrew's 5th Cavalry Division following, Major General H. W. Hodgson's Australian Mounted Division was ordered to advance to Damascus 90 miles (140 km) away travelling along the west coast of the Sea of Galilee and round its northern end, across the upper Jordan River to the south of Lake Huleh, through Quneitra and across the Hauran and on to Damascus.[17][18]
Major General G. de S. Barrow's 4th Cavalry Division was ordered to ride north from Beisan and cross the Jordan River at Jisr el Mejamie before advancing eastwards via Irbid to Deraa in the hope of capturing retreating remnants of the Ottoman Fourth Army. If they failed to capture the retreating columns they were to pursue them north along the ancient Pilgrims' Road and the Hejaz Railway to Damascus 140 miles (230 km) away.[18][19][20][21]
The XXI Corps' 3rd (Lahore) and 7th (Meerut) Divisions moved to garrison Haifa, Nazareth and Samakh; the 2nd Battalion Leicestershire Regiment, 28th Brigade (7th (Meerut) Division) was transported forward to Haifa in lorries with six days' supplies to relieve the 5th Cavalry Division on the morning of 25 September, the 21st Brigade (7th (Meerut) Division) marched up the coast to arrive at Haifa on 27 September, the 7th Brigade (3rd (Lahore) Division) marched north to Jenin and on to Nazareth where they detached one battalion before continuing on to garrison Samakh on 28 September.[3]
Pursuit
Sherifial Army capture of Deraa
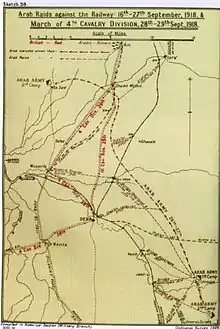
The limited participation of Prince Feisal's force had been invited on 21 September, when an RAF aircraft delivered news of Allenby's successful offensive and the destruction of the Ottoman Seventh and Eighth Armies, to its forward base at Azrak. The aircraft also carried instructions from Lieutenant Colonel Alan Dawnay, responsible for liaison between the EEF and the Arabs, informing Prince Feisal that they had closed all escape routes, except the Yarmuk Valley, which lay east of the Jordan. The message exhorted the Arabs to attempt to cut off this route and it was made clear to Prince Feisal that his force was not to "embark on any enterprise to the north, such as an advance on Damascus, without first obtaining the consent of the commander-in-chief."[22]
Allenby wrote to Prince Feisal:
There is no objection to Your Highness entering Damascus as soon as you consider that you can do so with safety. I am sending troops to Damascus and I hope that they will arrive there in four or five days from to-day. I trust that Your Highness' forces will be able to co-operate, but you should not relax your pressure in the Deraa district, as it is of vital importance to cut off the Turkish forces which are retreating North from Ma'an, Amman and Es Salt.
— Allenby letter to Prince Feisal 25 September 1918[23]
As the remnants of the Ottoman Fourth Army retreated northward via Deraa they were pursued over "many waterless miles", by Arab forces which "joined Feisal's force, with horrific consequences."[24][25] Three-quarters of Prince Feisal's 4,000-strong force including Nuri Al Shalaan's camel force, were irregulars. They had made a forced march overnight on 26/27 September, crossing the railway north of Deraa and tearing up rails to arrive at Sheikh Sa'd 15 miles (24 km) north northwest of Deraa, at dawn on 27 September. Auda abu Tayi captured a train and 200 prisoners at Ghazale Station, while Talal took Izra' a few miles to the north. A total of 2,000 prisoners were captured between noon on 26 September and noon on 27 September, when the Anazeh, an Arab tribal confederation attacked the rearguard defending Deraa. Fighting in the town continued into the night.[26]
At Deraa Lieutenant Colonel T. E. Lawrence and Colonel Nuri Bey met Barrow when the 4th Cavalry Division entered the town on 28 September, agreeing to cover the division's right flank during their pursuit north to Damascus.[27]
4th Cavalry Division

The 4th Cavalry Division began the pursuit by Desert Mounted Corps via Deraa, the day before the Australian Mounted Division with the 5th Cavalry Division in reserve, began their pursuit to Damascus via Quneitra.[21][Note 1]
The 4th Cavalry Division's the Central India Horse,[Note 2] (10th Cavalry Brigade) which had been garrisoning Jisr el Mejamie since 23 September, was joined there on 25 September by the remainder of the 10th Cavalry Brigade, from Beisan. They were ordered to advance as quickly as possible to Irbid and Deraa, and to contact Prince Feisal's Arab force. The brigade left Jisr el Mejamie and crossed the Jordan River on 26 September, as the remainder of the 4th Cavalry Division left Beisan for Jisr el Mejamie; the 11th Cavalry Brigade in the rear of the division, arriving at Jisr el Mejamie at 18:30 that day.[28][29][30]
Irbid 26 September
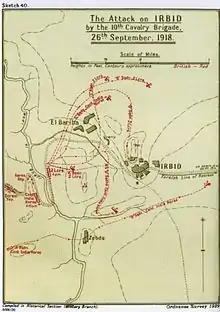
Late in the afternoon of 26 September the 10th Cavalry Brigade was attacked by the Fourth Army's flank guard which held the country round Irbid in force. Consisting of the Fourth Army's Amman garrison (less their rearguard captured at Amman), according to Archibald Wavell these troops had not been "heavily engaged,"[31] and Anthony Bruce argues that they were "still intact as a fighting force even though ...[they were]... in rapid retreat."[17]
The 2nd Lancers attempted a mounted attack without reconnaissance and without knowing the size of the defending force; the charge failed suffering severe losses, before the artillery could get into position.[17][31][32]
Ar-Ramtha 27 September
At Ar-Ramtha another strong rearguard position was captured by the 10th Brigade after what Wavell describes as "considerable fighting."[31] The 146th Regiment, commanded by Lieutenant Colonel Freiherr von Hammerstein-Gesmold, had arrived at Er Remta the day before the attack. This regiment, together with the 3rd Cavalry Division and 63rd Regiment etc., had made up the Fourth Army's Army Troops.[33]
The 10th Cavalry Brigade's 1/1st Dorset Yeomanry,[Note 3] with a subsection of machine gun squadron, rode from the Irbid area at 07:15 on 27 September in the vanguard. A British aircraft dropped a message 2 miles (3.2 km) beyond the Wadi Shelale which reported that Er Remta was clear of Ottoman force; however, as two troops approached the village, they were fired on at a range of 1,000 yards (910 m) and 300 Ottoman and or German troops advanced out of the village to the attack with an advanced force of 100 deployed for the attack while two hundred with four machine guns advanced in support. Three troops of the Dorset Yeomanry charged and captured a group of 50 which had crossed a wadi, while the remainder of the defenders retreated back into the village, where hand-to-hand fighting ensued among the houses.[34]
The Central India Horse (10th Cavalry Brigade) was ordered forward in support, organised into squadron columns in extended file across the Wadi Ratam, when they sighted 150 retreating defenders. Two squadrons formed a line on a wide front and charged the scattering Ottoman soldiers who got two machine guns into action, before being attacked with the lance. Four machine guns and 60 prisoners were captured, while another four machine guns and 90 prisoners were captured not far away.[35] The action was over by noon, when the 4th Cavalry Division headquarters and the 11th Cavalry Brigade which had camped for the night of 26/27 September at Jisr el Mejamie with the 12th Cavalry Brigade bivouacked 2.5 miles (4 km) east of the Jordan River, with orders to advance at 06:00 to Er Remta to join the 10th Cavalry Brigade, arrived.[36]
Ahead of the cavalry Australian aircraft reconnoitred Damascus for the first time on 27 September, when the railway station was seen to be filled with hundreds of rolling stock. Columns of retreating troops and transport were also seen on the roads heading north towards Deraa.[37]
Deraa 28 September
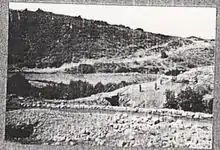
After halting for the night at Er Remte, Barrow commanding the 4th Cavalry Division ordered patrols by the 10th Brigade, to establish whether Deraa was defended. The brigade covered the assembly of the division at 04:30 on 28 September east of Er Remta before advancing at 07:00 towards Deraa. They reached Deraa during the early morning to find it occupied by Prince Feisal's Sherifial force. Contact was made with Lawrence, who informed them that Sherifial irregulars had captured Deraa the previous afternoon, and the 4th Cavalry Division entered the town.[17][27][31] Near Deraa a British airman from No. 144 Squadron who had been a prisoner of the Ottoman Empire was liberated, having managed to escape when the train he had been on collided with another train that had been derailed following a bombing on the railway.[37]
Dilli 29 September
The 10th Cavalry Brigade remained in Deraa to piquet the railway station, collect and care for the Ottoman wounded and bury their dead. They bivouacked for the night of 28/29 September in the station building while the 11th and 12th Cavalry Brigades moved out to Muzeirib to water. Barrow arranged with Prince Feisal's Chief Staff officer Colonel Nuri es-Said, for his Arab force to cover the 4th Cavalry Division's right flank during their pursuit to Damascus, which was to begin the next day.[38]
The 4th Cavalry Division's 70 miles (110 km) pursuit from Deraa to Damascus began with Prince Feisal's Arab force commanded by the Iraqi volunteer Nuri es-Said on the right flank while in the vanguard Arab irregulars (possibly Beni Sakhr) harassed the Ottoman force.[39][40] As they rode north they passed the bodies of about 2,000 Ottoman soldiers (according to Barrow) as well as their abandoned transport and equipment.[41]
However, the division rode west to Sheikh Miskin 13 miles (21 km) north-east of Muzeirib at 14:00 where it was joined by the 10th Cavalry Brigade from Deraa (see Falls Sketch Map 38) less a squadron left to protect the wounded. The division, running short of supplies moved 5 miles (8 km) north to bivouac at Dilli (pl) (see Falls Sketch Map 38) for the night of 29/30 September.[42] Rations carried by their Divisional Train had been issued at Muzeirib leaving 13 G.S. wagons carrying the last rations. Nine tons of barley as well as a small number of livestock were captured at Irbid and more goats had been requisitioned at Deraa.[43]
Allenby describes the scale of his victory:
My prisoners mount up. I hear, today, that 10,000, trying to break N., have surrendered to General Chaytor at Amman. This is probably true; but not yet verified. If true, it brings the total of prisoners to well over 60,000. I hope that my cavalry will reach Damascus tomorrow. Things are going swimmingly, too, in France and the Balkans.
— Allenby to Lady Allenby 29 September 1918.[44]
Zeraqiye 30 September
The Sharif of Mecca's Arabian Army had seen two columns of German and Ottoman soldiers; one consisting of 5,000 retreating north of Deraa and the other 2,000 strong was north of Muzeirib on the Pilgrims' Road. As the smaller column passed through Tafas they were attacked by Auda Abu Tayi's Arab regular horsemen with irregulars; splitting up this column to be eventually "engulfed by their pursuers." By 29 September the Arabian Army was attacking the larger column, and requesting assistance from the 11th Cavalry Brigade (4th Cavalry Division).[45]
The 4th Cavalry Division rode out of Dilli on 30 September towards Kiswe 30 miles (48 km) away.[43] The bulk of the remnant Fourth Army was much closer to Damascus in two main columns; the first, consisting of the remnants of an Ottoman cavalry division and some infantry, was approaching Kiswe, 10 miles (16 km) south of Damascus with the second column some miles behind, closely followed by Arab forces.[46]
Most of the division bivouacked at Zeraqiye at 16:30 while the 11th Cavalry Brigade reached Khiara 6 miles (9.7 km), further north where they saw the rearguard of the Fourth Army. Arab forces requested the support from the 11th Cavalry Division in an attack on this rearguard. Attempts by the 29th Lancers (11th Cavalry Brigade) to "head off" the Ottoman column were unsuccessful, while the Hants Battery which had been sent forward in support "over very bad ground", despite being "outranged by their screw-guns,"[Note 4] continued firing until dark. During the night continuing attacks by Auda Abu Tayi's force "practically destroyed" the larger column.[45] Only one German battalion reached Damascus intact on 30 September.[47]
By the evening of 30 September the 4th Cavalry Division was still 34 miles (55 km) from Damascus.[46][48]
5th Mounted and Australian Mounted Divisions
Kefr Kenna/Cana to Tiberias
The 5th Cavalry Division was relieved by the infantry on the morning of 25 September. They subsequently departed Haifa, reaching Kefr Kenna about 17:00 on 26 September where they concentrated.[49][50]
The Australian Mounted Division (less the 3rd and 4th Light Horse Brigades at Tiberias and Samakh, respectively) left Kefr' Kenna also known as Cana at midnight on 25 September, to reach the hill of Tel Madh overlooking Tiberias, at dawn on 26 September. After a short halt to water and feed, the division continued their march to El Mejdel, on the shore of the Sea of Galilee 4 miles (6.4 km) north of Tiberias, arriving in the early afternoon.[29]
At Tiberias the Australian Mounted Division waited for the 5th Cavalry Division to close up and for the 4th Light Horse Brigade to rejoin from Semakh, bivouacking there for the night of 26 September. While most of the division spent the afternoon resting and bathing in the Sea of Galilee, after the previous night's all night ride, patrols were sent forward as far as Jisr Benat Yakub.[29]
Australian Mounted Division
Jisr Benat Yakub 27 September
The Australian Mounted Division followed by the 5th Cavalry Division and Desert Mounted Corps headquarters left Tiberias on 27 September to begin the pursuit to Damascus.[51][52][53] They were held up for some hours at Jisr Benat Yakub (Bridge of the Daughters of Jacob) on the upper Jordan, north of Lake Tiberias.[37] Here, Liman had ordered the Tiberias Group, consisting of the survivors from the garrisons at Samakh and Tiberias, to "resist vigorously" the EEF pursuit by establishing rearguards south of Lake Hule.[54] The Ottoman rearguard blew up the bridge and established strong defences with machine guns on commanding positions on the east bank, overlooking the fords.[29][37] At Jisr Benat Yakub the river was deep and fast-flowing with steep banks, making it difficult to cross without the additional problem posed by machine-gun fire.[39][55][56]
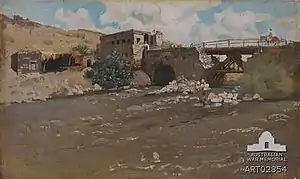
The 5th Light Horse Brigade's Régiment Mixte de Marche de Cavalerie rode across open ground to dismount and attack a section of the rearguard in buildings at the western end of the damaged bridge. During this frontal attack the French troopers suffered "some loss" as no artillery support was available.[57] The remainder of the 5th Light Horse Brigade searched for a ford to the south of the bridge, eventually swimming the river in the late afternoon but were caught in rocky ground on the opposite bank where they remained until first light.[56][58]
Meanwhile, the 4th Light Horse Regiment (4th Light Horse Brigade), successfully attacked the rearguard position overlooking the ford at El Min 1.5 miles (2.4 km) south of Jisr Benat Yakub. During the night, patrols crossed the river and the 4th Light Horse Regiment continued its advance to Ed Dora.[59][60]
The 3rd Light Horse Brigade advanced north along the western bank of the Jordan River to reach the southern shore of Lake Huleh, also in search of a crossing point.[56][58] A squadron of the 10th Light Horse Regiment crossed the river at twilight and captured a strong rearguard position, capturing 50 prisoners and three guns. By midnight, the brigade had crossed the river and had advanced 4 miles (6.4 km) to cut the Damascus road at Deir es Saras, but the main Ottoman rearguard force had already retreated.[60]
The Desert Mounted Corps Bridging Train arrived during the night in lorries and in five hours the sappers constructed a high trestle, to bridge the destroyed span. By daylight on 28 September the Australian Mounted Division was advancing up the road towards Quneitra followed soon after by their wheeled vehicles and guns, moving over the repaired bridge.[60][61]
Deir es Saras 27/28 September
The 3rd Light Horse Brigade was across the Jordan River by midnight and had advanced 4 miles (6.4 km) to cut the Damascus road at Deir es Saras, where a strong rearguard was attacked and captured, but the main Ottoman rearguard force which had defended Jisr Benat Yakub had already withdrawn.[60][62]
The first Ottoman or German aircraft, seen by the 3rd Light Horse Brigade since operations began on 19 September, passed overhead at 06:00 on 28 September.[63] An hour later three aircraft bombed the 8th Light Horse Regiment's (3rd Light Horse Brigade) bivouac but they were chased away by four British planes.[64] On their way to Deir es Saras, the 11th Light Horse Regiment (4th Light Horse Brigade) was bombed at 08:00 by two aircraft and machine-gunned from the air, resulting in a few casualties.[65]
The 12th Light Horse Regiment and four machine guns were ordered to march from Jisr Benat Yakub to Deir es Saras at 00:30 on 28 September. They crossed the Jordan River at 02:15 with the Régiment Mixte de Marche de Cavalerie, to capture 22 prisoners, three field guns and one machine gun. At Deir es Saras the Régiment Mixte de Marche de Cavalerie which had been attached to the 4th Light Horse Brigade reverted to the 5th Light Horse Brigade and the 4th Light Horse Regiment which had been attached to the 5th Light Horse Brigade since Lejjun returned to the 4th Light Horse Brigade at 09:00 on 28 September. The 4th Light Horse Brigade subsequently followed the 5th Light Horse Brigade to Abu Rumet scouting wide on both flanks while one squadron of 12th Light Horse Regiment escorted Divisional Transport from Jisr Benat Yakub.[66]
Quneitra 28 September
The Tiberias Group which had provided the rearguards defending the Jordan River south of Lake Huleh, was reinforced at Quneitra by troops from Damascus. At 06:00 an RAF aerial reconnaissance reported a force of about 1,200 holding the high ground around Quneitra. By 11:40 the vanguard of the Australian Mounted Division was climbing the slopes of Tel Abu en Neda which overlooks Quneitra on the Golan Heights, while the main body of the division had reached Tel Abu el Khanzir. At 12:50 an aircraft dropped a message that there was no traffic on the road south from Quneitra.[9][62][66][67]
Cavalry on cavalry encounter
Having been sent to reconnoitre a pass, at 13:00 the leading troops encountered a rearguard of 20 Circassian Cavalry which charged the Light Horsemen, and called on them to surrender. Sergeant Fitzmaurice and his troop then charged with swords drawn into the Circassians, killing and wounding some and taking the remainder prisoner.[60][68]
No further attacks occurred before the Australian Mounted Division arrived at Quneitra, with the 5th Cavalry Division arriving five hours later, having crossed the Jordan River. Both divisions bivouacked to the east and to the west of the village.[69][70] The 4th Light Horse Brigade moved through Quneitra at 15:30 to arrive at el Mansura at 16:00 to bivouac for the night.[66] The 3rd Light Horse Brigade bivouacked 3 miles (4.8 km) closer to Damascus near Jeba on the main road. They had travelled 35 miles (56 km) in 34 hours; the horses having been saddled the whole time except for two hours at Deir es Saras.[62][65]
Occupation of Quneitra
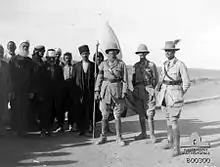
At the top of the watershed, Quneitra was 40 miles (64 km) from Damascus, the seat of government of a Kaza in the north of the district of Jaulan, and one of the most important Circassian towns in the region stretching from the Hauran to Amman. The large Moslem colony in and around the town had been given land by the Ottoman Empire after they had been forced out of the Ottoman provinces of Kars, Batoum, and Ardahan which had been annexed in 1877 by Russia.[56][70][71]
Groups of Arab and Druse were patrolling the Hauran, ready to capture any weakly-guarded convoy. As the nearest infantry were at Nazareth, 60 miles (97 km) away, Chauvel appointed Brigadier General Grant commanding the 4th Light Horse Brigade, GOC Lines of Communication to keep order around Quneitra and protect the lines of communication.[70][72][73]
Grant commanded a strong force of four cavalry regiments to maintain order among the hostile Circassians. The 4th Light Horse Brigade Headquarters and the 11th Light Horse Regiment remained at Quneitra with the Sherwood Rangers (5th Cavalry Division). These troops garrisoned the town and organised the lines of communication north to Damascus. The Hyderabad Lancers at Jisr Benat Yakub patrolled the region from Safed, 9 miles (14 km) south of Jisr Benat Yakub, while at Deir es Saras the 15th Light Horse Regiment (5th Light Horse Brigade) patrolled that region.[73][74][75]
During the afternoon four Bristol Fighters raided Damascus aerodrome and by the evening an advanced aircraft base had been established at Quneitra.[37][76]
On 29 September, grain requisitioned at Tiberias was distributed to units, when wheeled transport arrived. By then all the fresh meat requisitioned for the men had been consumed.[77] In order to feed the men and horses as well as 400 prisoners, "vigorous requisitioning" was carried out in the occupied region. Plenty of fresh meat for the men and good clover hay for the horses was supplied daily, but very little grain was found.[77] After requisitioning ten sheep from the inhabitants of el Mansura village, at 09:30 the 11th Light Horse Regiment relieved the 4th Light Horse Regiment day patrols on 29 September guarding the roads from Summaka and Hor later the Shek and Banias roads. By 30 September the 11th Light Horse Regiment was patrolling the lines of communication in the Quneitra district round the clock. No relief for any guard or picquet was possible for more than 24 hours, except for one troop, as all the men were on duty or were sick in hospital.[73]
Between 19 and 30 September the 4th Light Horse Brigade had suffered 73 horses killed (61 by the 11th LHR—probably at Samakh) three light draught horses, 12 rides and two camels destroyed, 14 rides, two light draught horses wounded and eight evacuated animal casualties. They captured 24 officers and 421 other ranks at Quneitra.[78]
Advance continues 29/30 September
The force which continued the advance from Quneitra consisted of the Australian Mounted Division with the 4th and 12th Light Horse Regiments (4th Light Horse Brigade) commanded by Lieutenant Colonel M.W.J. Bourchier (commanding 4th Light Horse Regiment) and known as "Bourchier's Force", along with the 3rd and 5th Light Horse Brigades followed by the 5th Cavalry Division.[46][74]
During the morning of 29 September retreating columns of German and Ottoman soldiers were seen by aerial reconnaissance in several groups with about 150 horse transports and 300 camels about 20 miles (32 km) south of Damascus. About 100 more infantry and pack camels were seen on the outskirts of Damascus.[79] Also during the morning a reconnaissance by the 11th Light Armoured Motor Battery (LAMB) had been attacked by a "force of all arms" estimated at 300 strong with machine guns and at least two guns, holding a rearguard position 20 miles from Quneitra across the road to Damascus four miles (6.4 km) south of Sa'sa.[63][80]
The Sa'sa rearguard force appeared to be divided in two; the left consisting of 50 German, 70 Ottoman soldiers, six machine guns and four guns.[63][81]
Action at Sa'sa
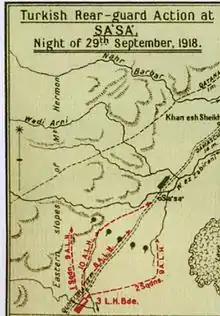
The advance to Damascus resumed during the afternoon of 29 September after canteen stores had been distributed, with the intention of marching through the night, to capture Damascus on the morning of 30 September.[46][63][82]
At 15:00 the 3rd Light Horse Brigade moved off with the remainder of the Australian Mounted Division following at 17:00. As advanced guard the 9th Light Horse Regiment with six machine guns attached, pushed forward one squadron with two machine guns which encountered the strong Ottoman position. Supported by machine guns and well sited artillery and situated on rising ground covered with boulders, their left flank was secured by a rough lava formation. By 19:00 the remainder of the 3rd Light Horse Brigade, seeing the advanced squadron being shelled by at least one battery, was moving forward to the right to attack the Ottoman left flank. The 10th Light Horse Regiment was sent forward in support to attack the right flank. However, the country either side of the road was too rough for the cavalry to advance across during the night and machine gun fire swept the road. The strong rearguard had stopped the pursuit.[52][63][80]
While the 9th and 10th Light Horse Regiments slowly continued their advance, at 02:00 on 30 September the 8th Light Horse Regiment (less one squadron) moving dismounted along the road, made a frontal attack on the rearguard position. With the cooperation of the 9th and 10th Light Horse Regiments the position had been captured by 03:00 along with five machine guns and some German prisoners. Some managed to withdraw but they were pursued by the 10th Light Horse Regiment which captured two 77 mm field guns, two machine guns and about 20 prisoners.[46][63][80] Sergeant M. Kirkpatrick of the 2nd New Zealand Machine gun Squadron described the action. A "sharp opposition was encountered from a battery and some machine guns well posted in difficult ground, all strewn with Mount Hermon's apples [boulders]. Deploying in the dark and over such ground was no easy matter, but finally the tenacious enemy was driven out and captured."[76]
During the attack on Sa'sa two members of the 4th Light Horse Regiment earned Distinguished Conduct Medals when they led charges at a German rearguard at Sa'sa. These two flank patrols of three men each attacked 122 Germans with four machine guns preparing to enfilade the Australian Mounted Division's flank, scattering them and eventually forcing their surrender.[83][Note 5]
Kaukab 30 September
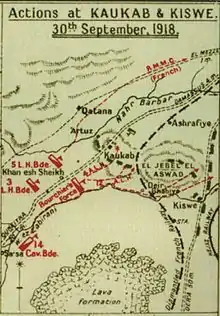
The 3rd and 5th Light Horse Brigades and Bourchier's Force (4th and 12th Light Horse Regiments) were ordered to continue the advance to the west of Damascus to cut the lines of retreat, west to Beirut and north to Homs.[84][85]
At dawn Lieutenant Colonel M. W. J. Bourchier's two regiments of the 4th Light Horse Brigade; the 4th Light Horse Brigade took over as the Australian Mounted Division's advanced guard towards Damascus with the 5th Light Horse Brigade at Khan esh Shiha and the 3rd Light Horse Brigade following in reserve after reassembling after the Sa'sa engagement.[86]
The advance attacked a column half a mile (800 m) from Kaukab capturing 350 prisoners, a field gun and eight machine guns and 400 rifles.[87][88][89]
The regiment saw a strong column about two miles (3.2 km) long take up a position on all the commanding places on Kaukab ridge/Jebel el Aswad (sv); from the western edge of a volcanic ridge stretching eastwards along the high ground. Patrols estimated the force to be 2,500 strong but there were no apparent signs of troops to protect their right flank.[90][91]
The 4th and 12th Light Horse Regiments were deployed on the right, while the 14th Light Horse and the Régiment Mixte de Marche de Cavalerie (RMMC) took up a position on the left with the 3rd Light Horse Brigade in the rear.[90]
The unprotected right flank was quickly outflanked by the Régiment Mixte de Marche de Cavalerie advance. As two batteries opened effective fire from a hillock, at 11:15 the 4th and 12th Light Horse Regiments charged mounted "with the sword." When the 4th Light Horse Regiment on the left and the 12th Light Horse Regiment on the right, charged up the slope the Ottoman defenders broke and ran. About 72 prisoners were captured along with 12 machine guns while large numbers retreated into woods towards Daraya and the Ottoman cavalry rode back to Damascus.[92][93]
The Régiment Mixte de Marche de Cavalerie continued their advance riding 5 miles (8 km) to the Baniyas to Damascus road beyond Qatana and on to southwest of El Mezze where they were heavily fired on by machine guns. The regiment dismounted to attack the position with one squadron of the 14th Light Horse Regiment following, slowly fighting their way along the Qalabat el Mezze ridge parallel to the road, until horse artillery batteries advanced up the main road at 13:00 and commenced firing on the Ottoman position which silenced them.[92]
From Kaukab, Damascus was 10 miles (16 km) away.[52]
5th Cavalry Division
Kiswe 30 September
On 29 September, Mustafa Kemal Pasha, commander of the Seventh Army arrived at Kiswe, with his army's leading troops. Liman von Sanders ordered him to continue on to Rayak, north of Damascus.[94] By the morning of 30 September, the leading column of the remnant Fourth Army consisting of an Ottoman cavalry division and some infantry, was approaching Kiswe 10 miles (16 km) south of Damascus, followed along the Pilgrims' Road by the 4th Cavalry Division 30 miles (48 km) behind.[46][95]
The 5th Cavalry Division, with the Essex Battery RHA in support, was ordered to attack a 2,000-strong Ottoman column retreating along the Pilgrim's Road nine miles (14 km) to the east.[51][95] Two regiments of the 14th Cavalry Brigade bypassed the 2,000-strong garrison in Kiswe in order to attack on another Ottoman rearguard three miles (4.8 km) closer to Damascus.[96]
The British Indian Army 20th Deccan Horse and the 34th Poona Horse (14th Cavalry Brigade) approached the road, with the hills of El Jebel el Aswad on their left. To the east of Kaukab, their progressed slowed. Here they were stopped by rearguards, while the road was heavily congested. Large numbers of retreating Ottoman soldiers, could also be seen further to the north, approaching Damascus.[97]
Two squadrons of Deccan Horse attacked and captured the nearest point on the hills overlooking the pass, while on their left a squadron of the 34th Poona Horse supported by the Essex Battery RHA charged into the German and/or Ottoman force, mounted splitting it in two and scattering the column. Here they captured 40 officers and 150 men. The 14th Brigade eventually bivouacked on the El Jebel el Aswad ridge with a total of 594 prisoners having suffered five killed and four wounded.[98]
Summation of cavalry advances
Four days after leaving Tiberias, in spite of delays caused by the difficulty of the terrain and a series of cavalry actions in which the German and Turkish rearguards were either overrun or harried into surrender, the Australian Mounted and 5th Cavalry Divisions arrived at Damascus.[51][52] They had left a day after the 4th Cavalry Division but arrived "within an hour of each other."[17]
In the 12 days from 19 to 30 September, Desert Mounted Corps' three cavalry divisions marched over 200 miles (320 km)/400 kilometres (250 mi), many riding nearly 650 kilometres (400 mi), fought a number actions, and captured over 60,000 prisoners, 140 guns and 500 machine guns.[99][100]
In response to this feat, Chetwode subsequently wrote to Chauvel, congratulating him for his "historic ride to Damascus" and "the performances of the Cavalry in this epoch-making victory." He went on to write that Chauvel had "made history with a vengeance" and that his "performance [would] be talked about and quoted long after many more bloody battles in France will have been almost forgotten.[101]
Damascus
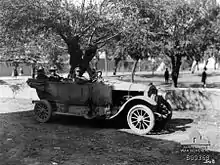
Approaches
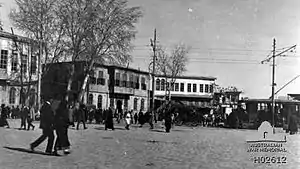
According to Lieutenant Hector W. Dinning from the Australian War Records in Cairo "the last 20 miles (32 km) to Damascus is good." The great green plain surrounding Damascus can be seen "from an immense distance". Like the sight of the Nile Delta, the rich green plain watered by the Abana and the Pharpar is in "sharp contrast" to the "brown rocky" and "desert-sand" country. Dinning writes, on approach "you skirt the stream of the Pharpar 10 miles (16 km) from the city. Damascus is hidden in the forest. You do not see its towers until you are upon it. But its sober suburbs you see climbing up the barren ridges of clay outside."[102]
According to the 1918 Army Handbook, Damascus, the largest urban settlement in Syria was also a Bedouin Arab city located in an oasis most of which lay east of the city. The Arab villagers and tenting nomads made "the environs of Damascus less safe than the desert ... [being] more likely to join in an attack on the city than to help its defence." In and around the main suburb of Salahiyeh, on the northwestern edge are many Kurds, Algerians and Cretan Moslems. One fifth of those living in the city are Christians of all denominations, including Armenians, while there are also some Jews of very ancient settlement. Almost all of the remainder are Arab Moslems. "The population is singularly particularist, proud, exclusive, conservative, and jealous of western interference. Arab independence centred on Damascus is a dream for which it will fight ..."[103]
The town was racially diverse and both Christian and Muslim services were held in the Great Mosque. Maunsell writes that "one-half of the building being reserved for the Christians and the other for the Mohammedans." Damascus was surrounded by "most beautiful gardens", while the "city has trams and electric light." Many of the buildings were constructed in the "Riviera" style while "most of the country outside [was] bare and stony, not unlike the Frontier [in India]."[104]
Defence
Liman von Sanders ordered the 24th, 26th and 53rd Infantry Divisions, XX Corps Seventh Army and the 3rd Cavalry Division, Army Troops Fourth Army, under the command of Colonel Ismet Bey (commander of the III Corps Seventh Army) to defend Damascus, while the remaining Ottoman formations were ordered to retreat northwards.[105][106] The Tiberias Group commanded by Mohammed Jemal Pasha, commander of the Fourth Army was also ordered to defend Damascus.[94] Liman von Sanders realised he could not defend the city and withdrew his Yildirim Army Group headquarters north to Aleppo.[107] During 30 September, retreating units passed through the outposts organised by Colonel von Oppen (commander of the Asia Corps) at Rayak. The 146th Regiment was the last formation to leave Damascus on 30 September. After hearing the Barada Gorge was closed von Hammerstein left Damascus by the Homs road, following the III Corps, the 24th Division and the 3rd Cavalry Division to Rayak.[94]
Encirclement
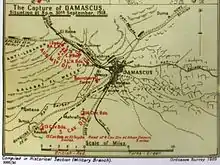
Australian aircraft had reconnoitred Damascus for the first time on 27 September when they saw the railway station filled with hundreds of carriages and engines. Retreating columns and transport were also seen on the roads from Deraa and north from Jisr Benat Yakub. During the afternoon of 28 September, Damascus aerodrome was bombed and burnt and the following morning Damascus was being evacuated.[37] All during 30 September long columns of retreating Ottoman and German soldiers had passed through Damascus.[108]
By midnight on 30 September, the Australian Mounted Division was at El Mezze two miles (3.2 km) to the west, the 5th Cavalry Division was at Kaukab and the 4th Cavalry Division was at Zeraqiye 34 miles (55 km) south of Damascus on the Pilgrims' Road with the 11th Cavalry Brigade at Khan Deinun with the Arab forces north-east of Ashrafiye. Chauvel ordered the 5th Cavalry Division to the east of Damascus.[46][48][Note 6]
The Australian Mounted Division moved west of the city to block the road to Beirut and the road north to Homs, Hama and Aleppo and occupy the city, while the 5th Cavalry Division moved to the south of the city to cut the road from Deraa.[55] Macandrew's 14th Brigade, 5th Cavalry Division held the Kaukab ridge captured by the 4th and 12th Light Horse Regiments. Barrow's 4th Cavalry Division and an Arab force were in action against the remnant Fourth Army around Khan Deinun. Arabs were reported camped at Kiswe, a few miles to the south of the city.[41][47]
According to Sergeant M. Kirkipatrick of the 2nd New Zealand Machine Gun Squadron:
German machine gunners, defending the suburbs, were quickly rooted out by our active horse artillery, while we galloped between the cultivation and the arid hills. Suddenly encountering a sharp and well-directed fire, we swerved abruptly into these hills, where the enemy, picketing the heights, were as quickly dispersed. From these hills we obtained a magnificent view of the city which 'The Prophet' thought 'A Paradise,' fortunately for his belief, he went not down, neither did the wind blow his way. Away to the south-east we could see a great converging column of the enemy struggling on to reach the city. They were the 20,000 Turks from the Deraa Base. Most of the fugitives were bagged by our Division ere they reached what they had fondly hoped was their haven of refuge.
— Sergeant M. Kirkpatrick 2nd New Zealand Machine Gun Squadron[109]
At 02:00 on 1 October a troop of the Gloucester Hussars (13th Cavalry Brigade) with a Hotchkiss rifle section was ordered to capture the wireless station at Qadam. They were unable to capture it before it was destroyed. From the west of Qadam the troop witnessed the destruction of the wireless station and the railway station before arriving at the headquarters of the Australian Mounted Division.[110]
A half-hour after the troop had set out, the remainder of the 13th Cavalry Brigade (5th Cavalry Division) at Kaukab, advanced to Kiswe arriving just before 04:30 at Deir Khabiyah mistaking it for Kiswe. One squadron of Hodson's Horse in the vanguard pursued and captured about 300 Ottoman soldiers before riding on into Kiswe to capture another 300 prisoners. After the brigade arrived at Kiswe they were ordered back to Kaukab. Having sent back 700 prisoners under escort the Hodson's Horse squadron advanced with machine guns and Hotchkiss rifles at the gallop, towards a 1,500-strong Ottoman column moving towards Damascus about ¾ mile (1.21 km) away, assuming the rest of the 13th Cavalry Brigade would reinforce them. Artillery of the 4th Cavalry Division, following the Ottoman column up the Pilgrims' Road, came to the squadron's support and enabled them to extricate themselves with the loss of one Hotchkiss gun and several horses.[111]
Damascus 1 October
After the Barada gorge was blocked retreating columns were still escaping Damascus to the north along the road to Aleppo.[112] A large column of Ottoman troops consisting of the 146th Regiment, the last Ottoman formation to leave Damascus on 30 September, marched out of Damascus along the Homs road to Rayak north-west of Damascus during the night. They followed the III Corps, the 24th Division and the 3rd Cavalry Division to concentrate there together with troops on the last Ottoman train which left the city about 21:00 on 30 September.[94][113][114] Only von Oppen's force which had travelled by train to Riyak before the Barda Gorge was closed and the 146th Regiment marching to Homs remained "disciplined formations."[9]
Surrender
The independence of Syria was proclaimed and the Hejaz flag raised over the Governor's palace by the Emir Said Abd el Kader, who formed a provisional council to rule the city until Prince Feisal took command.[41] Hughes writes that "GHQ instructed troops to allow Prince Feisal's force into the city 'first', even though the EEF had won the battle and reached Damascus before the Arabs."[115] The 3rd Light Horse Brigade had bivouacked outside the city the night before, having establishing picket lines to restrict entry to the city to all except Sherifian Regulars. With orders to cut the Homs road, the brigade entered Damascus at 05:00 on 1 October 1918.[95][116]
The 10th Light Horse Regiment as 3rd Light Horse Brigade advanced guard, descending a steep slope to the bottom of the Brada Gorge to arrived at the Dummar Station where several hundred Ottoman soldiers surrendered.[117][118] At the Baramkie railway station, they captured 500–1,000 prisoners on a train about to leave for Beirut.[113] Having cleared a way, they crossed the gorge and galloped into the city with drawn swords. As they rode through the city they passed the Baramkie barracks containing thousands of soldiers who did not interfere with their movements, but the streets were filling with people who forced them to slow to a walk.[117][118]
At the Serai, Hall of Government or Town Hall Major or Lieutenant-Colonel A.C.N. Olden, commanding the 10th Light Horse Regiment accepted the surrender of the city from Emir Said Abd el Kader.[118][119][120][Note 7] Olden later described the scene as a "large gathering, clad in the glittering garb of eastern officialdom, stood, formed up in rows."[121] Emir Said told Olden he had been installed as Governor the previous day and he now surrendered Damascus to the British Army.[121][Note 8]
Damascus was in a state of revolt; both the civil and military administrations had completely broken down and Olden warned that the shooting must be stopped.[107][118] He requested a guide to show the Australian light horsemen through the city to the Homs road.[118][119]
Administration
Independence was declared while about 15,000 Ottoman and German soldiers were still in Damascus, including Mohammed Jemal Pasha, the commander of the Fourth Army.[122] Allenby reported to King Hussein, Prince Feisal's father, on 1 October, informing him that they had entered the city and had captured over 7,000 prisoners.[123] The Arab Army arrived in Damascus at 07:30, after the 10th Light Horse Regiment had left the city, with T.E. Lawrence who drove into Damascus with Auda, Sherif Nasir, Nuri al-Shaalan, Emir of the Ruwalla and their forces. They met at the Town Hall and declared their loyalty to King Hussein, Prince Feisal's father.[51][124][125]
The Arabs subsequently proclaimed a government under King Hussein, raising their own flag and installing an Arab governor before Allenby's troops arrived.[126] According to Hughes, "the turmoil surrounding Damascus's fall, political (as opposed to military) decision-making devolved to a small group of comparatively junior British officers operating in the field. Lawrence was part of this group. He appeared to act, on occasion, independently but he was isolated from GHQ and London. Lawrence and his colleagues had to make decisions quickly in difficult and explosive situations."[127]
Shukri Pasha was subsequently appointed Military Governor of Damascus.[125] French and Arab claims which would take up a great deal of Allenby's time, were complicated by this Arab action and caused the French to distrust Prince Feisal.[128] This first Arab Administration ceased within days and Ali Riza Pasha el Rikabi took over.[129] French and Italian officers also arrived in Damascus, representing the interests of their countries as well as the independent American representative with the EEF, Yale, who reported feeling that he was being obstructed.[130]
Allenby reported to the War Office by telegram on 1 October, informing them that the Australian Mounted Division had entered Damascus, and that the Desert Mounted Corps and the Arab Army had occupied the town. His report concluded that "the civil administration remains in the hands of the existing authorities, and all troops, with the exception of a few guards, [had] been withdrawn from the town."[131] According to a letter he wrote to his wife, he intended to set out to Damascus the following day, remaining there until 4 October.[131]
Occupation
At 06:40 on 1 October Hodgson, commanding Australian Mounted Division ordered Bourchier's Force; the 4th and 12th Light Horse Regiments to patrol the western outskirts of Damascus south of the Barda Gorge. A barracks containing 265 officers and 10,481 men surrendered to the 4th Light Horse Regiment. These prisoners were marched to a concentration camp outside the city, while 600 men who were unable to walk and 1,800 in three hospitals were cared for. Guards were posted on the main public buildings and consulates until they were relieved by Sherifial troops.[132]
Desert Mounted Corps had captured a total of 47,000 prisoners since operations commenced on 19 September. Between 26 September and 1 October, the corps captured 662 officers and 19,205 other ranks.[129] About 20,000 sick, exhausted and disorganized Ottoman troops were taken prisoner in and around the Damascus.[107] Nearly 12,000 prisoners were captured in Damascus before noon on 1 October 1918 as well as large numbers of artillery and machine guns.[112] The 4th Light Horse Brigade captured a total of 11,569 prisoners in the city.[133] The 5th Cavalry Division took charge of 12,000 Ottoman prisoners.[134] Prisoners were walked out of Damascus to a camp.[135]
Allenby estimated that 40,000 Ottoman soldiers had been retreating towards Damascus on 26 September. The pursuit by Desert Mounted Corps had captured half of them. Falls writes that "this great cavalry operation in effect finally decided the fortune of the campaign."[9]
The official Australian historian, Henry Gullett, describes the scale of the victory: "the great Turkish and German force in Western and Eastern Palestine had been destroyed, and our prisoners numbered 75,000. Of the 4th, 7th and 8th Turkish Armies south of Damascus only a few thousand foot-sore, hunted men escaped. Practically every gun, the great bulk of the machine guns, nearly all the small-arms, and transport, every aerodrome and its mechanical equipment and nearly every aeroplane, an intricate and widespread telephone and telegraph system, large dumps of munitions and every kind of supplies—all had, in fourteen swift and dramatic days been stripped from an enemy who for four years had resisted our efforts to smash him. It was a military overthrow so sudden and so absolute that it is perhaps without parallel in the history of war. And it is still more remarkable because it was achieved at a cost so trifling."[136]
3rd Light Horse Brigade continue pursuit
After taking the surrender of Damascus, the 3rd Light Horse Brigade moved north along the Homs road. They were involved in virtually continual skirmishes throughout the day, in short but severe engagements. They pursued the Ottomans, fighting several engagements on 1 October when they captured 750 prisoners and several machine guns.[137][138]
Meanwhile, the 13th Cavalry Brigade (5th Cavalry Division) advanced to the east of the city to the Homs road, where they gained touch with the 14th Cavalry Brigade which had passed through Damascus at 10:30 also through the Bab Tuma gate to deploy outposts.[113][125]
The next day, at 06:15 on 2 October 1918 a long column was reported attempting to escape northwards. The 9th Light Horse Regiment trotted out at 06:45 and quickly got level with the main body of the column, two squadrons were ordered forward to Khan Ayash before the entrance to a pass. As soon as they had cut the road ahead a third squadron rode to attack the flank of the column but before it could engage the column surrendered.[139] They had captured over 2,000 prisoners including a divisional commander and the 146th Regimental standard, the only Ottoman colour taken by Australians in the First World War. The 146th Regiment had only recently been one of two "disciplined formations."[9][137][138]
Chauvel's march through Damascus on 2 October

When Chauvel arrived in Damascus, he told his staff set up camp in an orchard outside the city while he completed a reconnaissance. He dispatched a message to Lord Allenby via aircraft and also sent for the British supply officer who had been attached to the Hejaz Forces. According to Chauvel, this officer reported that the situation in the city was chaotic and that the intention of the Hejaz was "to make as little as possible of the British and make the populace think that it is the Arabs who have driven out the Turk". As a result, Chauvel decided to march through the city the following day, with "practically every unit being represented; guns, armoured cars, everything, and I also took possession of Djemal's house."[140]
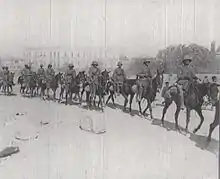
Allenby had instructed Chauvel to work through Lawrence until he arrived, but Lawrence was concerned to see Prince Feisal rule Syria, and he opposed a show of strength.[141] Nevertheless, according to Preston, Chauvel ordered a "display of force to overawe the turbulent elements in the town." Detachments from each brigade of Desert Mounted Corps and guns marched through Damascus led by Chauvel.[142] He was joined by Barrow, the 4th Cavalry Division commander, Macandrew, the 5th Cavalry Division commander and the Australian Mounted Division's commander Hodgson, along with staff representatives, one squadron of each regiment, one battery from each division of British Territorial Royal Horse Artillery and a section of the 2nd New Zealand Machine Gun Squadron. These troops marched through Damascus from Meidan in the south. The squadrons represented Australian light horse, French Chasseurs d'Afrique and Spahis, British Yeomenry, Indian cavalry regiments and a squadron of 2nd Light Horse Brigade which was part of the corps commander's bodyguard, represented the Anzac Mounted Division commanded by Chaytor.[129]
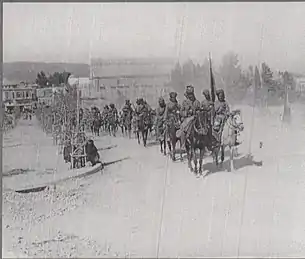
The march through Damascus began at 12:30 and finished at 15:00 with units back at the El Mezzo bivouac at 16:00 when two troops from B Squadron were assigned to protect the Australian Mounted Divisional Train.[143][Note 9]
Damascus meeting 3 October
Throughout late September, Allenby, Chauvel and the British War Office shared telegrams discussing their intentions regarding the administration of Syria following the fall of Damascus. The area included strong French interests, although Britain wanted Prince Feisal to rule Syria from Damascus and his Arab force was to control the city.[144] This would not extend into areas of French influence, although Allenby determined that he would appoint British officers to administer areas east of the Jordan until Arab administration could be formed. In Damascus, though, he planned to maintain recognise Arab administration, and would appoint French liaison officers, while retaining overall command as commander-in-chief.[145]
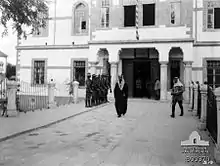
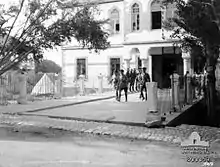
Allenby arrived in Damascus at the Hotel Victoria where he met with Prince Feisal on 3 October. He told Prince Fiesal to "moderate his aims and await decisions from London,"[146] and explained he would control Syria but not the Lebanon which the French would control.[147] Allenby went on to highlight that he was in supreme command and that, "as long as military operations were in progress ... all administration must be under my control", while informing him that the "French and British Governments had agreed to recognize the belligerent status of the Arab forces fighting in Palestine and Syria, as Allies against the common enemy."[148]
Prince Feisal claimed Lawrence had assured him Arabs would administer the whole of Syria, including access to the Mediterranean Sea through Lebanon so long as his forces reached northern Syria by the end of the war. He claimed to know nothing about France's claim to Lebanon.[149] Allenby left shortly afterwards for Tiberias.[150]
German Government resigns
The German Government resigned on 3 October with their armies in retreat following a series of defeats.[107]
Occupation continues
The 12th Light Horse Regiment bivouacked 1,000 yards (910 m) north-east of Kafarsouseh from 1 October while "A" Squadron remained 8 miles (13 km) south of Damascus, "C" Squadron reported to Colonel Lawrence for guard duty in the city and "B" Squadron guarded the Divisional Train. On 4 October the regiment took over guard duties from the 5th Cavalry Division and moved bivouac to south-west of El Mezzo. At 07:00 on 7 October a Taub aircraft dropped three bombs about 400 yards (370 m) from regimental headquarters without causing any casualties. At 08:30 regimental headquarters and "A" and "B" Squadrons moved to Damascus bivouacking at the White House 1,100 yards (1,000 m) west of Caseme Barracks while "C" Squadron was bivouacked near the French Hospital on Aleppo Road not far from the English Hospital. Here they continued various guard duties.[151]
Allenby reported to the War Office:
The total of prisoners captured by the EEF now exceeds 75,000, and it is estimated that of the 4th, 7th and 8th Armies and L. of C. troops not more than 17,000 have escaped, and that only 4,000 of these are effective rifles. We still have at Damascus at the present moment 25,000 of these 75,000 prisoners, and owing to their state of health and our lack of motor ambulances and lorries there is difficulty in bringing them back. Owing to an outbreak of cholera at Tiberias this place [where Allenby had his headquarters], which could have formed a good stop on the journey, is not available. There are 16,000 sick and wounded still to be evacuated out of the total of prisoners.
Damascus itself is tranquil, and the price of food has fallen 20% from what it was during the Turkish occupation. (Feisal has informed my Liaison officer with the Arab Administration that he will not issue any proclamation without consulting me. He is somewhat concerned as to the intentions of the French, but we are re-assuring him in every way possible.)
There is some destitution and disease in Amman, but my Medical Authorities are dealing with these. Otherwise the situation in the Amman-Es Salt area is satisfactory.
— Allenby to Wilson 8 October 1918[152]
Kaukab prisoners of war camp
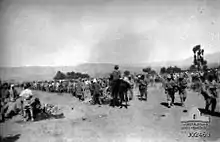
At Kaukab 10,000 prisoners in a compound were joined by 7,000 more moved from a compound at El Mezze, "in deplorable condition." They died at first at 70 per day which slowed to fifteen a day, under the command of Lieutenant Colonel T. J. Todd, 10th Light Horse Regiment which took over guard on 7 October from two squadrons of 4th Light Horse Regiment and one squadron of 11th Light Horse Regiment commanded by Major Bailey.[153][154] Todd found "[r]ations poor and no provision made for cooking. No drugs, or bandages for sick and wounded of whom about 3000 urgently required medical attention."[154]

Todd had the weakest men transferred to houses in the village, supplied blankets and Syrian doctors to treat the sick, organised the prisoners into companies under their own officers, and sanitary arrangements were developed. Four doctors among the officer prisoners began working in the compound but none spoke English. On the first day 69 dead were buried; the next day 170. On 8 October five Ottoman mobile cookers were received and soup cooked for the sick. Four water troughs and four pumps were erected along the stream for the prisoners of war. Daily reports sent in urgently called for blankets, drugs and disinfectant. On 9 October 762 Ottoman officers and 598 other ranks were sent to the compound while there were no evacuations to the Jordan. Two interpreters arrived on 10 October and Lieutenant Colonel Todd appointed Commandant of Prisoners of War Damascus area. By the next day rations had become fairly satisfactory but drugs, blankets and disinfectant were urgently needed. By 18 October the first batch of 1000 prisoners were evacuated by road organised into groups of 100 with their own NCOs, others followed. On 30 October Jacob's Horse reported to relieve 10th Light Horse Regiment which marched out at 15:30 for Homs.[153][155]
Supply problems
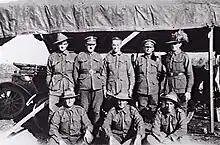
Damascus was 150 miles (240 km) from the EEF bases and Aleppo was 200 miles (320 km) beyond Damascus.[156] The most difficult problem caused by these great distances was the provision of food and medical comforts, because a regular supply service could not be maintained along the lines of communication.[157]
Captured ports were quickly organised as advanced bases, for supplying both Bulfin's XXI Corps and Chauvel's Desert Mounted Corps, advances.[158] Supplies began to be landed at Haifa on 27 September with 1,000 tons landed each day during the first week of October, but the infrastructure was lacking for moving the supplies the 85 miles (137 km) from Haifa to Damascus and 73 miles (117 km) from Afulah to Damascus, with a corps depot established at Samakh and carried in lorries on to Damascus.[159]
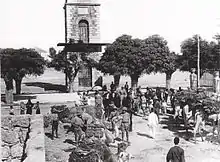
At the beginning of the pursuit, the supply route ran from Haifa, to Nazareth and on to Tiberias and Samakh, but by the time Desert Mounted Corps reached Damascus the corps had outrun its supply columns. The main problems were damage to the railway from Haifa to Samakh, which was repaired by 30 September, and the very bad condition of a two-mile (3.2 km) stretch of road from Jisr Benat Yakub towards Quneitra.[160] The stretch of "less than a mile leading up from the crossing of the Jordan at Jisr Benat Yakub", took on average a day to a day and a half to negotiate. It took three days by motor lorry to travel the 90 miles (140 km) from Semakh to Damascus. "There was only one narrow and winding road, running to the south-west and crossing a narrow bridge which broke down several times and was only wide enough for one vehicle. Most of the troops were camped along this road, on the outskirts of the town, and, since it was the only route by which they and the motor supply lorries from Semakh railhead could reach the town, it was frequently blocked."[157]
On 4 October 1918 the ration convoy broke down leaving the 12th Light Horse Regiment short two meals.[161] From 19 October supplies and rations of tea, milk and sugar were landed at Beirut and carried on lorries to Damascus and Baalbek for the two cavalry divisions.[162][163]
On 22 October Allenby reported:
I am at work on the broken bridges in the Yarmuk Valley; and, meanwhile, bridging the gap by camels and motor lorries. As for roads, I propose to concentrate on the coast road from Haifa northwards, then Tripoli–Homs road, and then Beirut–Baalbek road. I hope to keep them passable during the rains; then, with my standard gauge railway to Haifa, and using the Turkish railway Haifa–Damascus–Rayak, I may keep going. The railway, N. of Rayak, is standard gauge; and sleepers are steel, so that I can't squeeze the line in to the metre gauge; therefore, I fear it is useless to me, as yet.
— Allenby to Wilson 22 October 1918[164]
Requisitioning
Desert Mounted Corps' nearly 20,000 men and horses relied heavily on local supplies from 25 September onwards until the French took over the area in 1919.[165] Between 25 September and 14 October Desert Mounted Corps was dependent for forage on what they could requisition, fortunately, except on one or two occasions, water was plentiful.[99]
Food supplies for the troops and the 20,000 prisoners depended on requisitioning; "a business demanding patience and an admixture of firmness and tact."[166] This business was carried out "without extreme difficulty, and without in any way depriving the inhabitants of essential food."[167] Bread and meat for the men was to a large extent also supplied from local sources.[162] Grain concealed in Damascus and sheep and cattle from the local region were requisitioned.[153]
Medical situation
At first no medical units could enter Damascus, a town of some 250,000 inhabitants, due to the turmoil and uncertain political situation. They began coming in the next day.[168] Many of the 3,000 Ottoman sick and wounded were found in six groups of hospitals. One group of hospitals at Babtuma housed 600 patients, another group housed 400 patients, 650 seriously wounded Ottoman soldiers were found in the Merkas hospital, about 900 were found in the Beramhe Barrack. In a building near the Kadem railway station 1,137 cases were found. On orders from Chauvel, they were made the first duty of the medical service.[168]
Although a few cholera cases were found at Tiberias and quickly eradicated there was none at Damascus, but typhus, enteric, relapsing fever, ophthalmia, pellagra, syphilis, malaria and influenza were found in the prisoners. Desert Mounted Corps field ambulances treated over 2,000 cases with 8,250 patients admitted to hospitals in Damascus. Evacuations were mainly by motor convoys to the nearest ports and then by hospital ships.[169] At first all seriously ill British and Ottoman sick were held in Damascus due to the arduous 140-mile (230 km) evacuation to Haifa.[170]
The journey to Haifa began in motor lorries from Damascus to Samakh, but it was so fatiguing that it had to be negotiated in two stages.[Note 10] The first stage of 42 miles (68 km) was to Quneitra where the mobile section of the 4th Light Horse Field Ambulance kept them overnight. The second stage was to Rosh Pina 4th Cavalry Division collecting station, then on to Semakh where the 4th Cavalry Division receiving station put the sick on trains to Haifa, about 50 miles (80 km) away. After their 140-mile (230 km) journey they were cared for by a British field ambulance till a hospital ship took them to Egypt.[170] Motor ambulances were also used, but they broke down, and supplies of petrol ran out.[157]
The supply of motor lorries was insufficient for the evacuation of sick and wounded as well as the evacuation of prisoners. There were over 10,000 prisoners in the Damascus area who put great pressure on the food supply. Downes writes that "it was arranged that returning ammunition lorries, available only at very irregular intervals, should be used for the sick and wounded, and supply-lorries for the prisoners of war."[170]
Along the pursuit by the Australian Mounted Division and 5th Cavalry Division, and the 4th Cavalry Division, wounded and increasing numbers of sick were held in collecting stations. They waited evacuation by returning supply motor lorries.[171] At a monastery above the shore of the Sea of Galilee north of Tiberias, monks cared for sick Australians who thought they were at home; the shore for half a mile beyond a little jetty was planted with eucalyptus. They ate freshly picked bananas from a nearby grove, oranges and fresh fish.[172]
The 4th and 5th Cavalry Divisions in the Rayak-Moallaka area were ordered to stop evacuations to Damascus until the Beirut way was established.[173] A Combined Clearing Hospital was landed at Beirut following the occupation of the city on 11 October and gradually became the main evacuation route via Moallaka from Damascus, a distance of 71 miles (114 km) when the Samakh route wound down.[174] According to Downes, the route between Damascus and Beirut was considered to be of fair quality. Running westerly over the Anti-Lebanon range, it then crossed "a plain between the two ranges and ascends the Lebanon range. The road up the eastern side of the range, after a blown-up bridge had been repaired, was good. It was, however, very steep and winding for several miles, the descent to the coast, involving numerous sharp turns, was even more dangerous, in some cases being too much for the brakes of the motor ambulances."[174]
Spanish flu and malaria
.jpg.webp)
During the pursuit, the Desert Mounted Corps had travelled around the malarial shores of the Sea of Galilee and fought on the malarial banks of the Jordan between Jisr Benat Yakub and Lake Huleh. Within a few days of operations in Damascus area finishing, malaria and pneumonic influenza, then sweeping through the Near East, spread quickly infecting the regiments.[175] The epidemic spread quickly, assuming startling proportions in Damascus, along the lines of communication south of the city, and also to the north. Virtually all sick in the early stages were serious cases. Medical supplies quickly became short, while supplies of suitable food for a light diet were inadequate and blankets and mattresses ran short as there were no facilities to disinfect them so they had to be destroyed in many instances.[176]
The Australian Medical Corps, commanded by Colonel Rupert Downes, became responsible for the care of the sick in Damascus.[177] Major W. Evans, the DADMS of the Australian Mounted Division, was appointed Principal Medical Officer of Damascus and became responsible for reorganising the hospital system.[178]
Cases of malignant malaria contracted in the Jordan Valley south of Jisr ed Damieh before the offensive, were increased by those contracted in the Jordan Valley north of Jisr ed Damieh and around Beisan.[179] In the week ending 5 October more than 1,246 troopers of the Desert Mounted Corps had reported sick to hospital and another 3,109 cases were reported the following week. Many who had contracted previously suffered malaria in the Jordan Valley were now in a different climate, tired and worn out from two weeks of almost constant operations, and they relapsed and or contracted Spanish flu, the worldwide influenza epidemic.[180][181]
Downes describes the situation as follows:
...during the first week in Damascus a very heavy outbreak of serious febrile disease occurred. The exact nature of this was not at the time clear, and has indeed in some measure remained a matter of debate. Damascus was then in the grip of pneumonic influenza, and was suspected—in some cases not without cause—of dysentery, typhus, cholera, phlebotomus and other fevers. In the circumstances that existed, it may well be believed that close clinical observation was not easy. Most of the pyrexia was called influenza, dysentery, or even cholera. An outbreak of cerebro-spinal fever was suspected. The arrival of the Malaria Diagnosis Station on October 12 in some measure cleared up the situation. All the supposed cholera and cerebral cases, and a large proportion of those of dysentery, were found malarial. Of the cases diagnosed as influenza and whose blood was examined, a large proportion were found to harbour the malarial parasite and were presumed to be cases of this same disease. It is therefore clear that, simultaneously with an outbreak of pneumonic influenza, a huge rise took place at this moment in the incidence of malignant malaria both in the Desert Mounted Corps and also in Chaytor's Force.
— R. M. Downes Australian Medical Corps.[182]
Due to a breakdown in evacuations on 10 October, the only divisional receiving station in Damascus, the 5th Cavalry Division receiving station, had on 11 October between 800 and 900 seriously ill patients mostly suffering from broncho-pneumonia and malignant malaria. There were many deaths and some cases of malarial diarrhoea were diagnosed as cholera. The malarial diagnosis station arrived the next day. The staff was exhausted and severely reduced; medical supplies and blankets ran low. One hundred Australian light horsemen were reassigned to medical orderly duties, a large convoy of sick was evacuated by motor lorries the next day and the arrival of supplies of milk relieved the situation. The Australian Mounted Division receiving station also arrived and relieved the 5th Cavalry Division receiving station which had admitted 1,560 British and Australian sick out of a total of 3,150 admitted to all the medical units that week. At Babtuma hospital the Ottoman sick rose from 900 to 2,000.[183] Sick prisoners of war were retained in Damascus due to lack of accommodation in Egypt.[173]
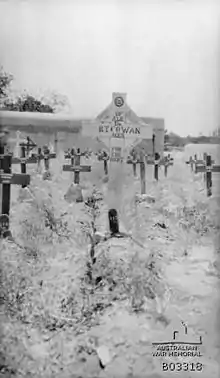
Medical service personnel became ill at a higher rate than cases from the combat units and no reinforcements were arriving. The loss of administrative officers was crippling. The 4th Cavalry Division receiving station was unable to move for eight days owing to illness; only two motor ambulances had drivers.[174] Many doctors became ill during the period including corps staff members. This included the DDMS, Colonel Rupert Downes. Of the 99 medical officers in the three mounted divisions of the Desert Mounted Corps, 23 were sick and the DDMS of the corps was ill from 6 October; DMS, EEF had no officer available to replace him. He, along with the ADMS and DADMS Australian Mounted Division, did what they could from their beds; the ADMS 5th Cavalry Division remained well but was with his division advancing towards Aleppo.[174][179]
By 14 October the position in Damascus was quickly becoming normal and by 16 October the evacuation chain was considered to be working satisfactorily. The DMS, EEF at Ramleh following a visit by his ADMS on 11 October to Damascus ordered 100 RAMC privates who had been on their way to France as infantrymen to return to Damascus on 18 October. This would be followed the next day by 18 cars of the Motor Ambulance Convoy and the 25th Casualty Clearing Station took over the Australian Mounted Division receiving station cases. The Desert Mounted Corps handed over administration of the sick in Damascus to the lines of Communication Headquarters early in November, after the fighting with the Ottoman Empire had finished.[173]
Three weeks after Damascus was occupied Allenby reported to the War Office outlining his evacuation plans. He reported that he had initially planned to evacuate thousands of troops to Malta, but evacuations from Salonika had reduced Malta's spare capacity. He also outlined that the health of the Ottoman prisoners was improving and that pending transport, they would be evacuated to Egypt.[184]
Of the total of 330,000 members of the Australian Imperial Force (AIF) which left Australia during the four years of war, 58,961 died, 166,811 had been wounded and 87,865 were sick.[185][186] More cases of malaria were suffered following the advance to Damascus than has ever been suffered by Australian forces.[187]
12th Light Horse Regiment
The men of the 12th Light Horse Regiment were reported in the War Diary of 8 October, to be "far from well and require a good rest otherwise the ranks will be greatly depleted." By 12 October the number of sick was increasing and two days later, the regiment reported that the troops were "...still having a bad time with fever. 50 prisoners daily...[were]...employed to look after horses and clean up the lines so that sufficient men...[could]...be made available to furnish the usual [guard] posts." By 17 October, the regiment was understrength by one officer and 144 other ranks. Eight reinforcements arrived the next day and by 19 October the worst was over, after which it was reported that the situation began to improve with the passing of each day.[188]
State of the horses
Those horses which had been in the field, even with light condition, survived the long marches carrying about 20 stone (130 kg) and rapidly picked up afterwards while those which had recently arrived did not do so well.[166]
During the Battle of Megiddo and Capture of Damascus; from 15 September to 5 October, 1,021 horses were killed in action, died or were destroyed. Out of a total of 25,618 horses involved in the campaigns, 3,245 were admitted to veterinary hospitals and mobile veterinary sections. They mainly suffered galls, debility, fever and colic or diarrhoea. After they were treated 904 were returned to service.[153]
Impact of sickness on EEF effectiveness
The losses to the two infantry corps were high but these divisions, being mainly located back in malaria free areas near to railheads and hospitals, were not required for military operations, except for the 7th (Meerut) Division which advanced to occupy Beirut and Tiberias. The losses to Desert Mounted Corps were alarming because any further advance would be heavily dependent on its ability to fight.[181]
| Anzac Mounted Division | Australian Mounted Division | |||
|---|---|---|---|---|
| 1918 | Adm to F.Ambs | Evac from F.Ambs | Adm to F.Ambs | Evac from F.Ambs |
| 15–30 Sept | 5.49 | 4.97 | 3.27 | 3.04 |
| October | 7.79 | 6.30 | 6.16 | 4.86 |
| November | 2.79 | 2.47 | 4.20 | 3.35 |
| December | 1.68 | 1.52 | 1.53 | 1.20 |
The numbers of sick due to malaria; mainly malignant malaria, doubled from 1 September to 1 October; from 2.85 to 5.51 percent, with Indian and European soldiers being almost equally affected. Desert Mounted Corps sick for the week ending 5 October of 1,246 rose to 3,109 for the week ending 12 October. Although the death rate was not high, four times as many deaths occurred at Damascus as were killed between 19 September and 1 October. Of the 479 deaths in hospital during October and November less than 20 were from wounds.[190]
Aftermath
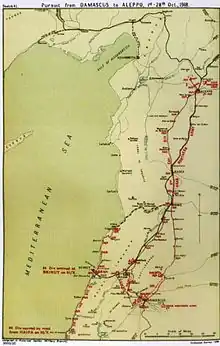
The capture of Damascus was a victory so influential that it made future major battles in the theatre unlikely, despite the ongoing nature of the conflict. According to Cyril Falls, nothing but distance itself could separate the EEF for long from "the mountain masses of Taurus and Amanus."[191] Falls states that by this stage of the war, the Allies believed the Ottoman Empire's resources were "nearly exhausted", and although economic dislocation as a result of the war led to famines across Lebanon and Syria in 1918, the situation remained uncertain. Further, the Ottoman Empire's ability to replace the lost armies was also unknown.[191][192]
The advance along the Mediterranean coast by the 7th (Meerut) Division occupied Beirut on 7 October and Tripoli on 13 October when two important ports were captured, from which support for the inland pursuit northwards could be provided.[193][194] This inland pursuit by the 5th Cavalry Division reached Baalbek on 10 October, Homs three days later where they received orders to advance to Aleppo 120 miles (190 km) away, on 20 October. They rode out without the 4th Cavalry Division but with support from the Sherifian army and the 2nd, 11th and 12th Light Armoured Motor Batteries and the 1st (Australian), 2nd and 7th Light Car Patrols.[195][196]
Aleppo was captured by Prince Feisal's Sherifian army with support from the armoured cars and the 15th (Imperial Service) Cavalry Brigade on 25 October.[197][198] The following day the 15th (Imperial Service) Cavalry Brigade were attacking strong rearguards at Haritan eight miles (13 km) north-west of Aleppo and on 27 October, the Australian Mounted Division was ordered to move north in support of the 5th Cavalry Division.[199][200]
A cemetery for the British and Commonwealth casualties of WWI and WWII is located near Mezzeh.[201]
Notes
- ↑ These advances have been characterised as a "race for Damascus". [Gullett 1919 pp. 39–40, Falls 1930 Vol. 2 p. 567]
- ↑ This is the 38th King George's Own Central India Horse, not to be confused with the 39th King George's Own Central India Horse which had remained in India [Preston 1921, p.335]
- ↑ The 1/1st Dorset Yeomanry was serving in the EEF in April 1917 when they formed part of the 6th Mounted Brigade, Imperial Mounted Division by October 1917 they had been transferred to the Yeomanry Mounted Division. [Falls 1930 Vol. 1 pp. 401–2, Vol. 2 pp. 661–2]
- ↑ The barrel and breech were carried separately, and screwed together for action. See the British example RML 2.5-inch mountain gun.
- ↑ They were Trooper Charles William Heywood, Regimental No. 32 (temporary corporal) and Lance Corporal James Alfoncis Moodie, Regimental No. 1104 (temporary sergeant). (G. Massey 2007 pp. 55, 75. See also Australian War Memorial Recommendation AWM28-2-128-0098)
- ↑ The Australian Mounted Division had left a day after the 4th Cavalry Division which rode east to Deraa, but arrived in Damascus within an hour of each other. [Bruce 2002 p. 241]
- ↑ Falls describes the person who surrendered Damascus as "Mohammed Said" later he describes two brothers "Mohammed Said" and "Abd el Kadir". [Falls pp. 589, 591] Olden took the surrender of Damascus from the grandson of Abd el Kadir, the governor appointed by the withdrawing Ottoman governor, Djemal Pasha on 30 September. The Kadir family were French retainers. Their fledgling provisional civil government had to be removed before Prince Feisal could form his government. [Hughes 1999 pp. 102, 104–5]
- ↑ Wavell notes that "these were the first of the British forces to enter Damascus." [Wavell 1968 p. 229]
- ↑ The diary states that although it was expected that all units would be represented, the 12th Light Horse Regiment and between "20 and 30 O/Ranks from 4th LH Regt were the only Australian Regts represented." [12th LHR War Diary]
- ↑ See the supply problems section above for descriptions of the road from Damascus to Samakh.
Citations
- ↑ Falls 1930 Vol. 2 p. 560
- 1 2 Falls 1930 Vol. 2 pp. 560–1
- 1 2 3 4 Falls 1930 Vol. 2 p. 561
- ↑ Falls 1930 Vol. 2 pp. 511, 545
- ↑ Keogh 1955 p. 251
- ↑ Wavell 1968 p. 223
- ↑ Falls 1930 Vol. 2 p. 545
- ↑ Falls 1930 Vol. 2 pp. 545–6
- 1 2 3 4 5 Falls 1930 Vol. 2 p. 594
- ↑ Cutlack 1941 pp. 167–8
- ↑ Falls 1930 Vol. 2 p. 567
- ↑ Falls p. 594
- ↑ Falls 1930 Vol. 2 pp. 582–3, 595
- 1 2 Hughes 2004 p. 188
- ↑ Falls 1930 Vol. 2 p. 603
- ↑ Wavell 1968 p. 222
- 1 2 3 4 5 Bruce 2002 p. 241
- 1 2 Preston 1921 pp. 247–8
- ↑ Bou 2009 pp. 195–6
- ↑ Wavell 1968 p. 224
- 1 2 Keogh 1955 pp. 252–3
- ↑ Bruce 2002 p. 238
- ↑ Hughes 2004 p. 187
- ↑ Wavell 1968 p. 221
- ↑ Woodward 2006 p. 201
- ↑ Falls 1930 Vol. 2 pp. 566–7
- 1 2 Falls 1930 Vol. 2 pp. 582–3
- ↑ Maunsell 1926 p. 231
- 1 2 3 4 Preston 1921 p. 252
- ↑ Gullett 1919 p. 39
- 1 2 3 4 Wavell 1968 pp. 224–5
- ↑ Falls 1930 Vol. 2 pp. 579–80
- ↑ Falls pp. 594, 674
- ↑ Falls 1930 Vol. 2 p. 581
- ↑ Falls 1930 Vol. 2 pp. 581–2
- ↑ Falls 1930 Vol. 2 pp. 580–2
- 1 2 3 4 5 6 Cutlack 1941 p. 167
- ↑ Falls 1930 Vol. 2 p. 583
- 1 2 Wavell 1968 p. 225
- ↑ Bruce 2002 p. 242
- 1 2 3 Hill 1978 p. 176
- ↑ Falls 1930 Vol. 2 pp. 583–4
- 1 2 Falls 1930 Vol. 2 p. 584
- ↑ Hughes 2004 p. 190
- 1 2 Falls 1930 Vol. 2 p. 585
- 1 2 3 4 5 6 7 Wavell 1968 p. 227
- 1 2 Bruce 2002 p. 244
- 1 2 Falls 1930 Vol. 2 p. 586
- ↑ Preston 1921 p. 249
- ↑ Falls 1930 Vol. 2 pp. 561, 567
- 1 2 3 4 Bou 2009 p. 196
- 1 2 3 4 Hill 1978 p. 175
- ↑ Falls 1930 p. 567
- ↑ Falls 1930 Vol. 2 pp. 594–5
- 1 2 Carver 2003 p. 242
- 1 2 3 4 Bruce 2002 p. 243
- ↑ Preston 1921 pp. 258–60, 335
- 1 2 Wavell 1968 pp. 225 & 227
- ↑ 4th Light Horse Brigade War Diary 27 September 1918 AWM4-10-4-21
- 1 2 3 4 5 Falls 1930 Vol. 2 p. 568
- ↑ Preston 1921 p. 262
- 1 2 3 3rd Light Horse Brigade War Diary AWM4-10-3-44 Appendix 4 pp. 4–5
- 1 2 3 4 5 6 3rd Light Horse Brigade War Diary AWM4-10-3-44 Appendix 4 p. 5
- ↑ 8th Light Horse Regiment War Diary AWM4-10-13-39
- 1 2 11th Light Horse Regiment War Diary 28 September 1918 AWM4-10-16-36
- 1 2 3 4th Light Horse Brigade War Diary 28 September 1918 AWM4-10-4-21
- ↑ Carver 2003 p. 241
- ↑ 10th Light Horse Regiment War Diary 28 September 1918 AWM4-10-15-39
- ↑ Falls 1930 Vol. 2 pp. 568–9
- 1 2 3 Preston 1921 p. 263
- ↑ British Army Handbook 9/4/18 p. 67
- ↑ Hughes 1999 p. 65
- 1 2 3 11th Light Horse Regiment War Diary 29 September 1918 AWM4-10-16-36
- 1 2 Falls 1930 Vol. 2 p. 569
- ↑ 4th Light Horse Brigade War Diary 29 September 1918 AWM4-10-4-21
- 1 2 Powles 1922 p. 243
- 1 2 4th Light Horse Brigade War Diary AWM4-10-4-21 Appendix 286 30/9–2/10/18
- ↑ 4th LHBwd AWM4-10-4-21
- ↑ Cutlack 1941 p. 168
- 1 2 3 Falls 1930 Vol. 2 p. 570
- ↑ Falls 1930 Vol. p. 570 & note
- ↑ 10th Light Horse Regiment War Diary 29 September 1918 AWM4-10-15-39
- ↑ G. Massey 2007 pp. 55, 75
- ↑ Bruce 2002 pp. 243–4
- ↑ Falls 1930 Vol. 2 pp. 569–74
- ↑ 3rd LHBwd AWM4-10-3-44 Appendix 4 Report pp. 5–6
- ↑ Falls 1930 Vol. 2 pp. 569–71
- ↑ 4th LHRwd AWM4-10-9-45
- ↑ AMDwdAWM4-1-58-15
- 1 2 Falls 1930 Vol. 2 p. 571
- ↑ 4th Light Horse Regiment War Diary AWM4-10-9-45
- 1 2 Falls 1930 Vol. 2 p. 572
- ↑ Australian Mounted Division Staff War Diary AWM4-1-58-15
- 1 2 3 4 Falls 1930 Vol. 2 p. 595
- 1 2 3 Falls 1930 Vol. 2 p. 574
- ↑ Falls 1930 Vol. 2 p. 575
- ↑ Falls 1930 Vol. 2 pp. 574–5
- ↑ Falls 1930 Vol. 2 pp. 575–6
- 1 2 Blenkinsop 1925 p. 242
- ↑ Jones 1987 pp. 156–7
- ↑ Phillip W. Chetwode commanding XX Corps, letter to Chauvel dated 5 October 1918, cited in Hill 1978 pp. 186 & 188
- ↑ Dinning 1920 p. 89
- ↑ Army Handbook 9/4/18 p. 69
- ↑ Maunsell 1926 p. 240
- ↑ Erickson 2001 pp. 200–1
- ↑ Falls 1930 Vol. 2 p. 674
- 1 2 3 4 Keogh 1955 p. 253
- ↑ Falls 1930 Vol. 2 p. 588
- ↑ Powles 1922 pp. 243–4
- ↑ Falls 1930 Vol. 2 p. 577
- ↑ Falls 1930 Vol. 2 pp. 576–7
- 1 2 Gullett 1919 p. 43
- 1 2 3 Preston 1921 pp. 276–7
- ↑ Bruce 2002 p. 245
- ↑ Hughes 1999 p. 97
- ↑ Hughes 1999 pp. 98–9
- 1 2 Falls 1930 Vol. 2 pp. 588–9
- 1 2 3 4 5 Hill 1978 p. 178
- 1 2 Falls 1930 Vol. 2 pp. 589
- ↑ Jones 1987 p. 157
- 1 2 Olden quoted in Jones 1987 p. 157
- ↑ Preston 1921 p. 276
- ↑ Hughes 2004 p. 193
- ↑ DiMarco 2008 p. 332
- 1 2 3 Falls 1930 Vol. 2 p. 591
- ↑ Hughes 2004 p. 201
- ↑ Hughes 1999 p. 107
- ↑ Falls 1930 Vol. 2 p. 592
- 1 2 3 Falls 1930 Vol. 2 p. 593
- ↑ Hughes 1999 pp. 108–9
- 1 2 in Hughes 2004 p. 192
- ↑ Falls 1930 Vol. 2 pp. 590–1
- ↑ Australian Mounted Division Administration, Headquarters War Diary October 1918 Appendix 5, AWM4-1-59-16
- ↑ Bruce p. 246
- ↑ Hill 1978 p. 182
- ↑ Gullett 1919 pp. 22–5
- 1 2 Wavell 1968 p. 229
- 1 2 Gullett 1941 p. 776
- ↑ Falls 1930 Vol. 2 p. 590
- ↑ Chauvel speaking at the Romani Dinner in 1923 quoted in Hill 1978 pp. 179–180
- ↑ Hughes 1999 pp. 98, 103
- ↑ Preston 1921 p. 279
- ↑ 12th Light Horse Regiment War Diary 2 October 1918 AWM 4-10-17-18
- ↑ Hughes 1999 pp. 97–98
- ↑ Hughes 2004 p. 191
- ↑ Hughes 1999 pp. 105–6
- ↑ Hughes 1999 p. 105
- ↑ Allenby report to the War Office 6 October 1918 in Hughes 2004 p. 202
- ↑ Bruce 2002 pp. 246–7
- ↑ Hughes 2004 297–300
- ↑ 12th Light Horse Regiment War Diary 1–7 October 1918 AWM4-10-17-18
- ↑ in Hughes 2004 pp. 204–5
- 1 2 3 4 Falls 1930 Vol. 2 p. 599
- 1 2 10th Light Horse Regiment War Diary 7 October 1918 AWM4-10-15-40
- ↑ 10th Light Horse Regiment War Diary 8–18 October 1918 AWM4-10-15-40
- ↑ Wavell 1968 p. 230
- 1 2 3 Downes 1938 p. 732
- ↑ Hill 1978 p. 188
- ↑ Falls 1930 Vol. 2 pp. 562–3, 600
- ↑ Downes 1938 pp. 726–7
- ↑ 12th Light Horse Regiment War Diary 5 October 1918 AWM4-10-17-18
- 1 2 Falls 1930 Vol. 2 p. 601
- ↑ Preston 1921 p. 248
- ↑ in Hughes 2004 p. 211
- ↑ Preston 1921 pp. 248, 322–3
- 1 2 Falls 1930 Vol. 2 p. 600
- ↑ Preston 1921 pp. 322–3
- 1 2 Downes 1938 p. 729
- ↑ Falls 1930 Vol. 2 p. 598
- 1 2 3 Downes 1938 p. 733
- ↑ Downes 1938 pp. 726–8
- ↑ Dinning 1920 pp. 85–6
- 1 2 3 Downes 1938 p. 739
- 1 2 3 4 Downes 1938 p. 738
- ↑ Gullet 1941 p. 773
- ↑ Downes 1938 pp. 735–6
- ↑ Hughes 1999 p. 101
- ↑ Downes 1938 p. 731
- 1 2 Hill 1978 p. 183
- ↑ Bou 2009 p. 197
- 1 2 Falls 1930 Vol. 2 p. 597
- ↑ Downes 1938 pp. 747, 775
- ↑ Downes 1938 p. 737
- ↑ Allenby to Wilson 22 October 1918 in Hughes 2004 pp. 210–11
- ↑ Luckins 2004 p. 27
- ↑ Kyle 2003 p. 234
- ↑ Dennis et al 2008 p. 354
- ↑ 12th Light Horse Regiment War Diary 8–19 October 1918 AWM4-10-17-19
- ↑ Downes 1938 p. 745
- ↑ Falls 1930 Vol. 2 pp. 597–8
- 1 2 Falls 1930 Vol. 2 p. 596
- ↑ Hughes 1999 p. 66
- ↑ Bruce 2002 p. 251
- ↑ Falls 1930 Vol. 2 p. 607
- ↑ Falls 1930 Vol. 2 p. 610
- ↑ Bruce 2002 pp. 253–4
- ↑ Preston 1921 pp. 288–291
- ↑ Wavell 1968 p. 232
- ↑ Falls 1930 Vol. 2 pp. 613–4, 617
- ↑ Downes 1938 p. 741
- ↑ "Damascus Commonwealth War Cemetery". Commonwealth War Graves Commission.
References
- "4th Light Horse Regiment War Diary". First World War Diaries AWM4, 10-9-45. Canberra: Australian War Memorial. September 1918.
- "8th Light Horse Regiment War Diary". First World War Diaries AWM4, 10-13-39. Canberra: Australian War Memorial. September 1918. Archived from the original on 19 April 2012. Retrieved 18 September 2012.
- "10th Light Horse Regiment War Diary". First World War Diaries AWM4, 10-15-39. Canberra: Australian War Memorial. September 1918. Archived from the original on 23 October 2012. Retrieved 18 September 2012.
- "11th Light Horse Regiment War Diary". First World War Diaries AWM4, 10-16-36. Canberra: Australian War Memorial. September 1918. Archived from the original on 16 March 2011. Retrieved 18 September 2012.
- "12th Light Horse Regiment War Diary". First World War Diaries AWM4, 10-17-2. Canberra: Australian War Memorial. February–December 1916. Archived from the original on 16 March 2011. Retrieved 18 September 2012.
- "3rd Light Horse Brigade War Diary". First World War Diaries AWM4, 10-3-44. Canberra: Australian War Memorial. September 1918. Archived from the original on 21 March 2011. Retrieved 18 September 2012.
- "4th Light Horse Brigade War Diary". First World War Diaries AWM4, 10-4-21. Canberra: Australian War Memorial. September 1918. Archived from the original on 13 October 2012. Retrieved 18 September 2012.
- "Australian Mounted Division Administration, Headquarters War Diary". First World War Diaries AWM4, 1-59-18. Canberra: Australian War Memorial. October 1918.
- Bou, Jean (2009). Light Horse: A History of Australia's Mounted Arm. Australian Army History. Port Melbourne: Cambridge University Press. ISBN 9780521197083.
- Bruce, Anthony (2002). The Last Crusade: The Palestine Campaign in the First World War. London: John Murray. ISBN 978-0-7195-5432-2.
- Carver, Michael, Field Marshal Lord (2003). The National Army Museum Book of The Turkish Front 1914–1918: The Campaigns at Gallipoli, in Mesopotamia and in Palestine. London: Pan Macmillan. ISBN 978-0-283-07347-2.
{{cite book}}: CS1 maint: multiple names: authors list (link) - Cutlack, Frederic Morley (1941). The Australian Flying Corps in the Western and Eastern Theatres of War, 1914–1918. Official History of Australia in the War of 1914–1918. Vol. VIII (11th ed.). Canberra: Australian War Memorial. OCLC 220900299.
- Dennis, Peter; Grey, Jeffrey; Morris, Ewan; Prior, Robin (2008). The Oxford Companion to Australian Military History. with Jean Bou (2nd ed.). Melbourne: Oxford University Press, Australia & New Zealand. OCLC 489040963.
- DiMarco, Louis A. (2008). War Horse A History of the Military Horse and Rider. Yardley, Pennsylvania: Westholme Publishing. OCLC 226378925.
- Dinning, Hector W.; James McBey (1920). Nile to Aleppo. New York: MacMillan. OCLC 2093206.
- Downes, R. M. (1938). "The Campaign in Sinai and Palestine". In Butler, A.G (ed.). Gallipoli, Palestine and New Guinea. Official History of the Australian Army Medical Services, 1914–1918: Volume 1 Part II (2nd ed.). Canberra: Australian War Memorial. pp. 547–780. OCLC 220879097.
- Erickson, Edward J. (2001). Ordered to Die: A History of the Ottoman Army in the First World War: Forward by General Hüseyiln Kivrikoglu. No. 201 Contributions in Military Studies. Westport Connecticut: Greenwood Press. OCLC 43481698.
- Falls, Cyril (1930). Military Operations: Egypt & Palestine from June 1917 to the End of the War. Official History of the Great War Based on Official Documents by Direction of the Historical Section of the Committee of Imperial Defence: Volume 2 Part II. A. F. Becke (maps). London: HM Stationery Office. OCLC 256950972.
- Great Britain, Army, Egyptian Expeditionary Force (1918). Handbook on Northern Palestine and Southern Syria (1st provisional 9 April ed.). Cairo: Government Press. OCLC 23101324.
{{cite book}}: CS1 maint: multiple names: authors list (link) - Gullett, Henry S. (1941). The Australian Imperial Force in Sinai and Palestine, 1914–1918. Official History of Australia in the War of 1914–1918. Vol. VII (11th ed.). Canberra: Australian War Memorial. OCLC 220900153.
- Henry S. Gullett; Charles Barnet; David Baker, eds. (1919). Australia in Palestine. Sydney: Angus & Robertson. OCLC 224023558.
- Hall, Rex (1975). The Desert Hath Pearls. Melbourne: Hawthorn Press. OCLC 677016516.
- Hill, Alec Jeffrey (1978). Chauvel of the Light Horse: A Biography of General Sir Harry Chauvel, GCMG, KCB. Melbourne: Melbourne University Press. OCLC 5003626.
- Hughes, Matthew (1999). John Gooch; Brian Holden Reid (eds.). Allenby and British Strategy in the Middle East 1917–1919. Military History and Policy. Vol. 1. London: Frank Cass. OCLC 470338901.
- Hughes, Matthew, ed. (2004). Allenby in Palestine: The Middle East Correspondence of Field Marshal Viscount Allenby June 1917 – October 1919. Army Records Society. Vol. 22. Phoenix Mill, Thrupp, Stroud, Gloucestershire: Sutton Publishing. ISBN 978-0-7509-3841-9.
- Jones, Ian (1987). The Australian Light Horse. Australians at War. Australia: Time-Life Books. OCLC 18459444.
- Keogh, E. G.; Joan Graham (1955). Suez to Aleppo. Melbourne: Directorate of Military Training by Wilkie & Co. OCLC 220029983.
- Kyle, Roy; Bryce Courtenay (2003). An Anzac's Story. Camberwell Vic.: Penguin Books. OCLC 155843481.
- Luckins, Tanja (2004). The Gates of Memory Australian People's Experiences and Memories of Loss and the Great War. Fremantle W.A.: Curtin University Books. OCLC 223755815.
- Massey, Graeme (2007). Beersheba: The Men of the 4th Light Horse Regiment Who Charged on the 31st October 1917. Warracknabeal, Victoria: Warracknabeal Secondary College History Department. OCLC 225647074.
- Maunsell, E. B. (1926). Prince of Wales' Own, the Seinde Horse, 1839–1922. Regimental Committee. OCLC 221077029.
- Powles, C. Guy; A. Wilkie (1922). The New Zealanders in Sinai and Palestine. Official History New Zealand's Effort in the Great War. Vol. III. Auckland: Whitcombe & Tombs. OCLC 2959465.
- Preston, R. M. P. (1921). The Desert Mounted Corps: An Account of the Cavalry Operations in Palestine and Syria 1917–1918. London: Constable & Co. OCLC 3900439.
- Wavell, Field Marshal Earl (1968) [1933]. "The Palestine Campaigns". In Sheppard, Eric William (ed.). A Short History of the British Army (4th ed.). London: Constable & Co. OCLC 35621223.
- Woodward, David R. (2006). Hell in the Holy Land: World War I in the Middle East. Lexington: The University Press of Kentucky. ISBN 978-0-8131-2383-7.
